Case Management
When an inbound call is delivered to the MotionCX Agent a case will automatically be created to document the interaction. This case will be saved to and viewable throughout the MotionCX platform.
Within the MotionCX Agent, the Case Details panel will include the case form with required fields and dispositions that have been configured for the incoming queue. Field values set and saved in the MotionCX Agent will appear on the case within the MotionCX web portal. It is not necessary to fill out the fields in both the MotionCX Agent AND the MotionCX web portal, either one may be used.
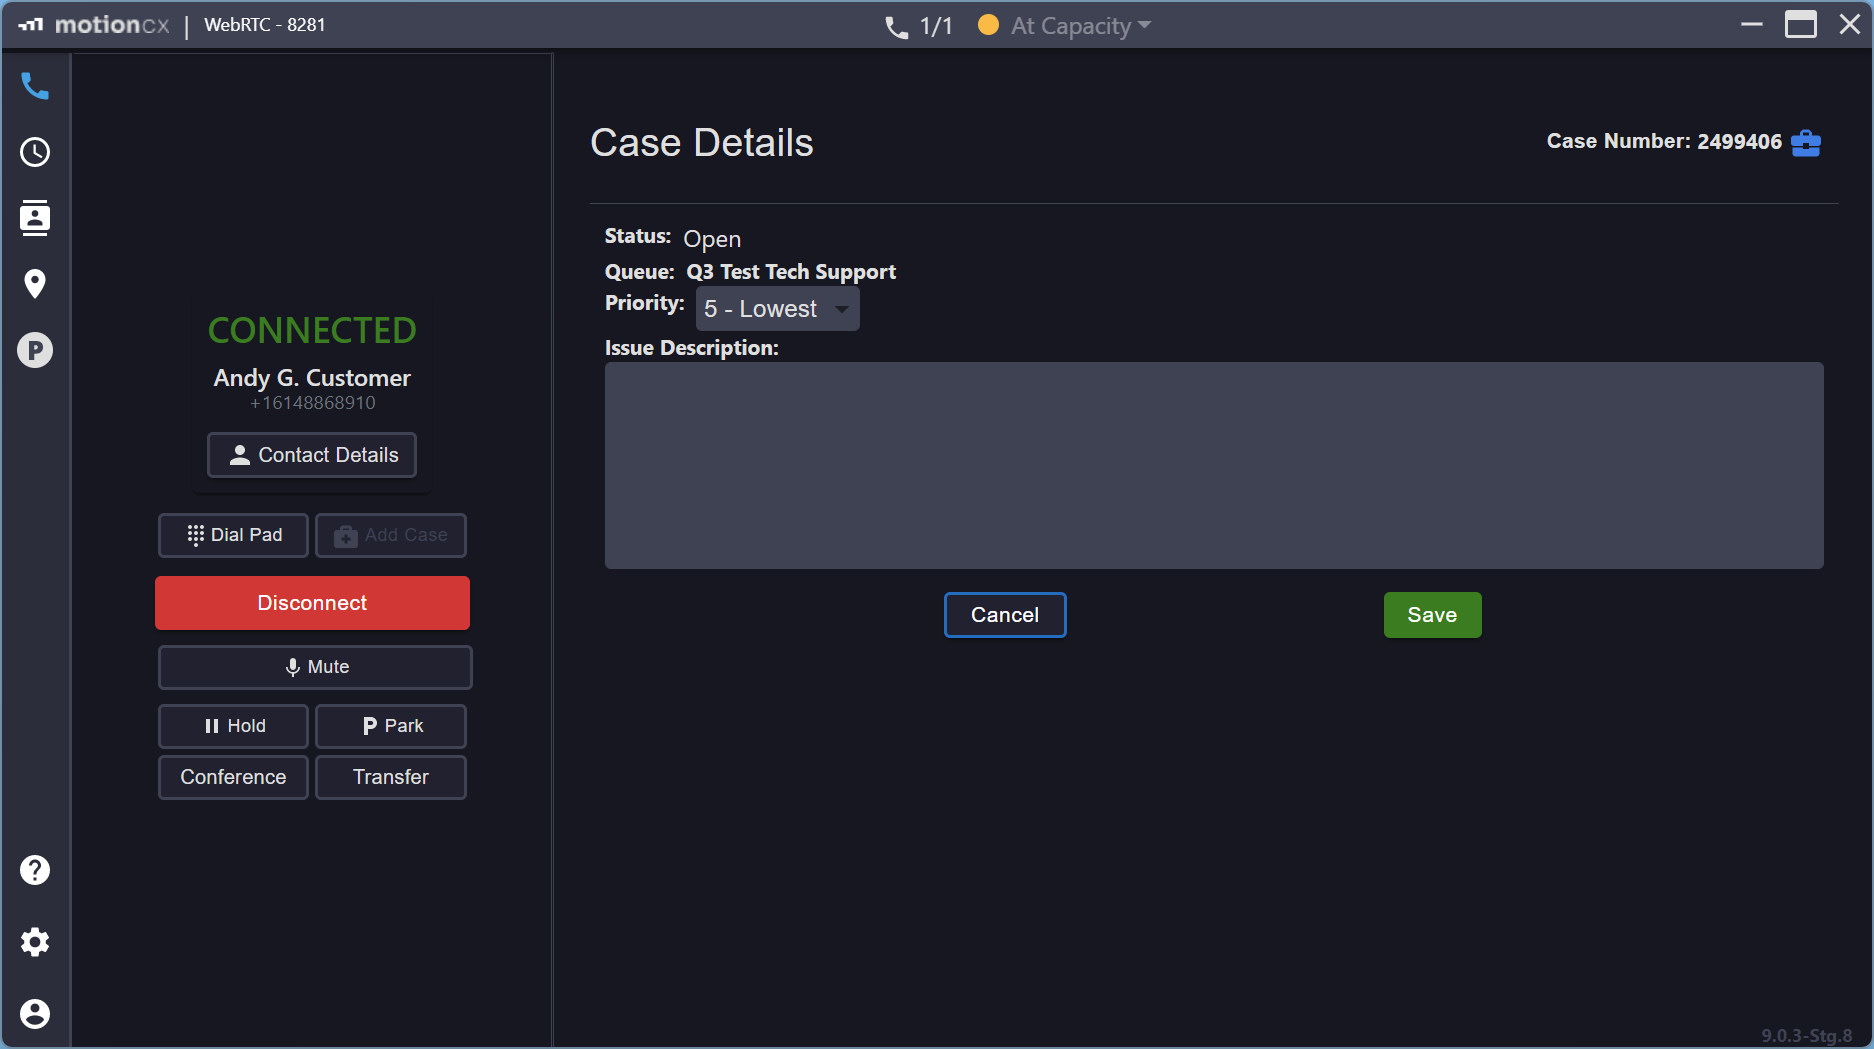
Case Details Panel
Custom FieldsDepending on the incoming queue, custom fields may be displayed in the case details panel. These additional fields can be used to collect specific information about the case. If you have questions about the fields on a case form, or other standard operating procedures for completing a case form, please reach out to your manager and/or MotionCX administrator for guidance.
Searching For Cases
Cases, created automatically from an inbound call or manually in the MotionCX Web Portal, can be viewed from the MotionCX Agent. To search for an existing case, click the Select Case link on the Home screen. In the Select Case window enter the full case number and click the search button. Select the case from the search results list and click the Select button to open the Case Details. Once opened, you can make changes to the case and save as needed.
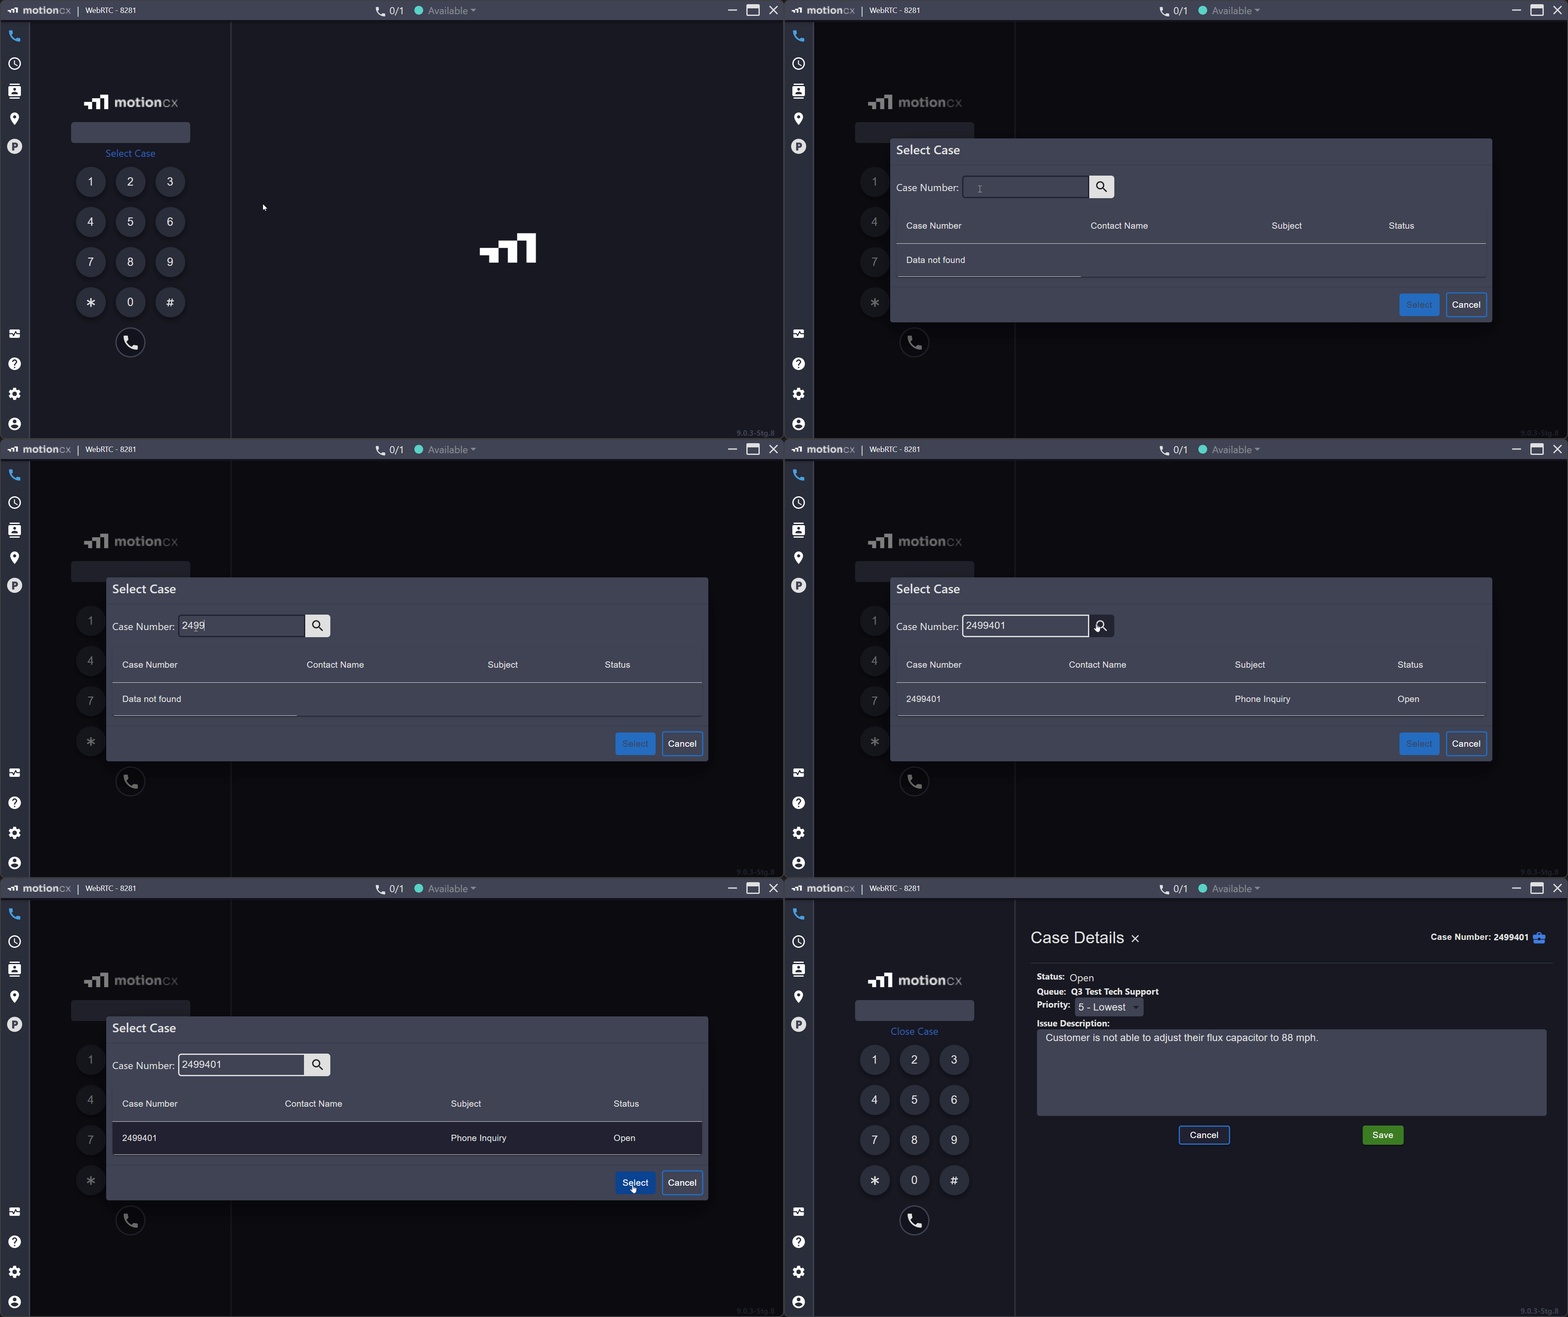
Searching For A Case
Associating An Outbound Call
If you are placing an outbound call in relation to an existing case, it may be helpful to link the call with the existing case so that the call recording and any case changes made can be captured. To associate an ongoing outbound call to an existing case, click the Add Case button on the call details panel or content panel. In the Select Case window enter the full case number and click the search button. Select the case from the search results list and click the Select button to open the Case Details. At this point the ongoing outbound call and existing case are associated. You can also make changes to the case and save as needed.
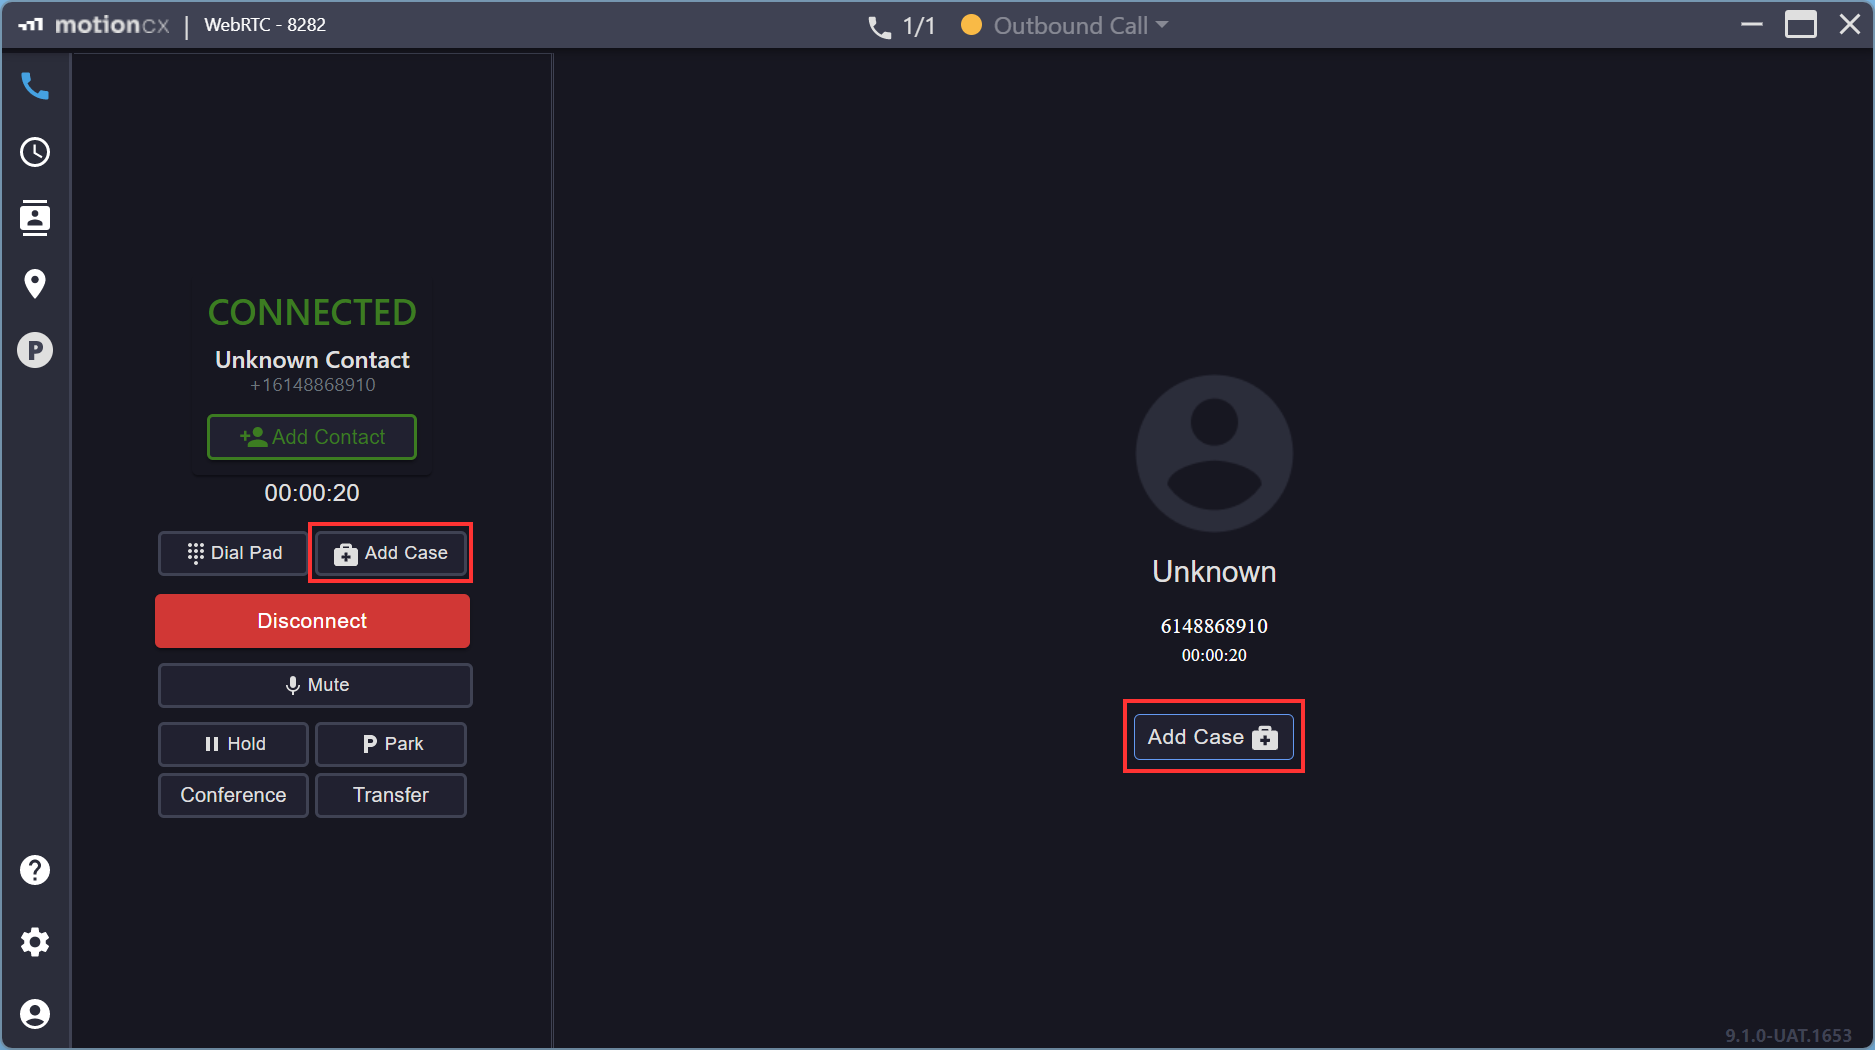
Associating A Case
Viewing All Case Form Fields
As the case form within the MotionCX Agent will only display required fields, it may be necessary to open the case in the web portal to view or edit all case form fields. To open a case in the web portal from the MotionCX Agent application, click the blue Case icon within the upper right of the case form.
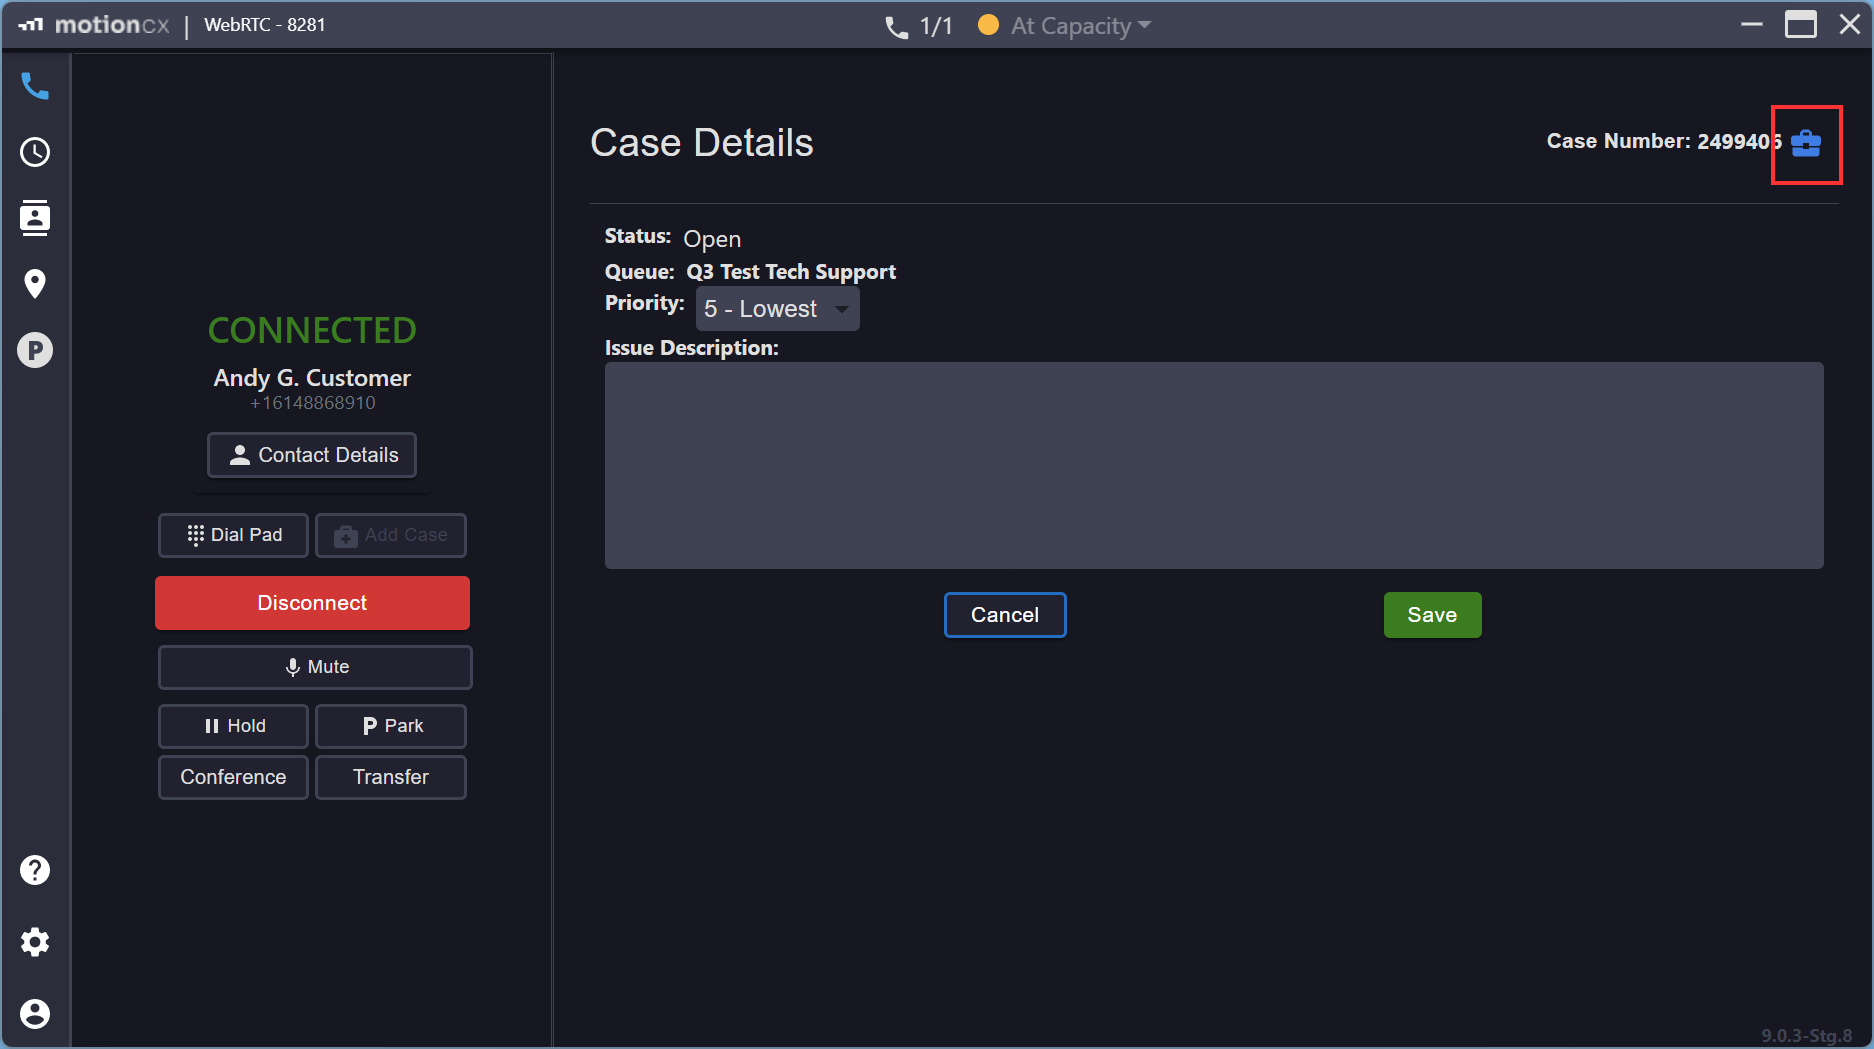
Expand Case Button
Closing The Call Panel
Once a call has disconnected, the call panel and case form will remain open. Clicking the Close Call Panel button will check for unsaved changes and either close the call panel and case form if no unsaved changes are found, or allow the user to edit and save unsaved changes prior to closing.
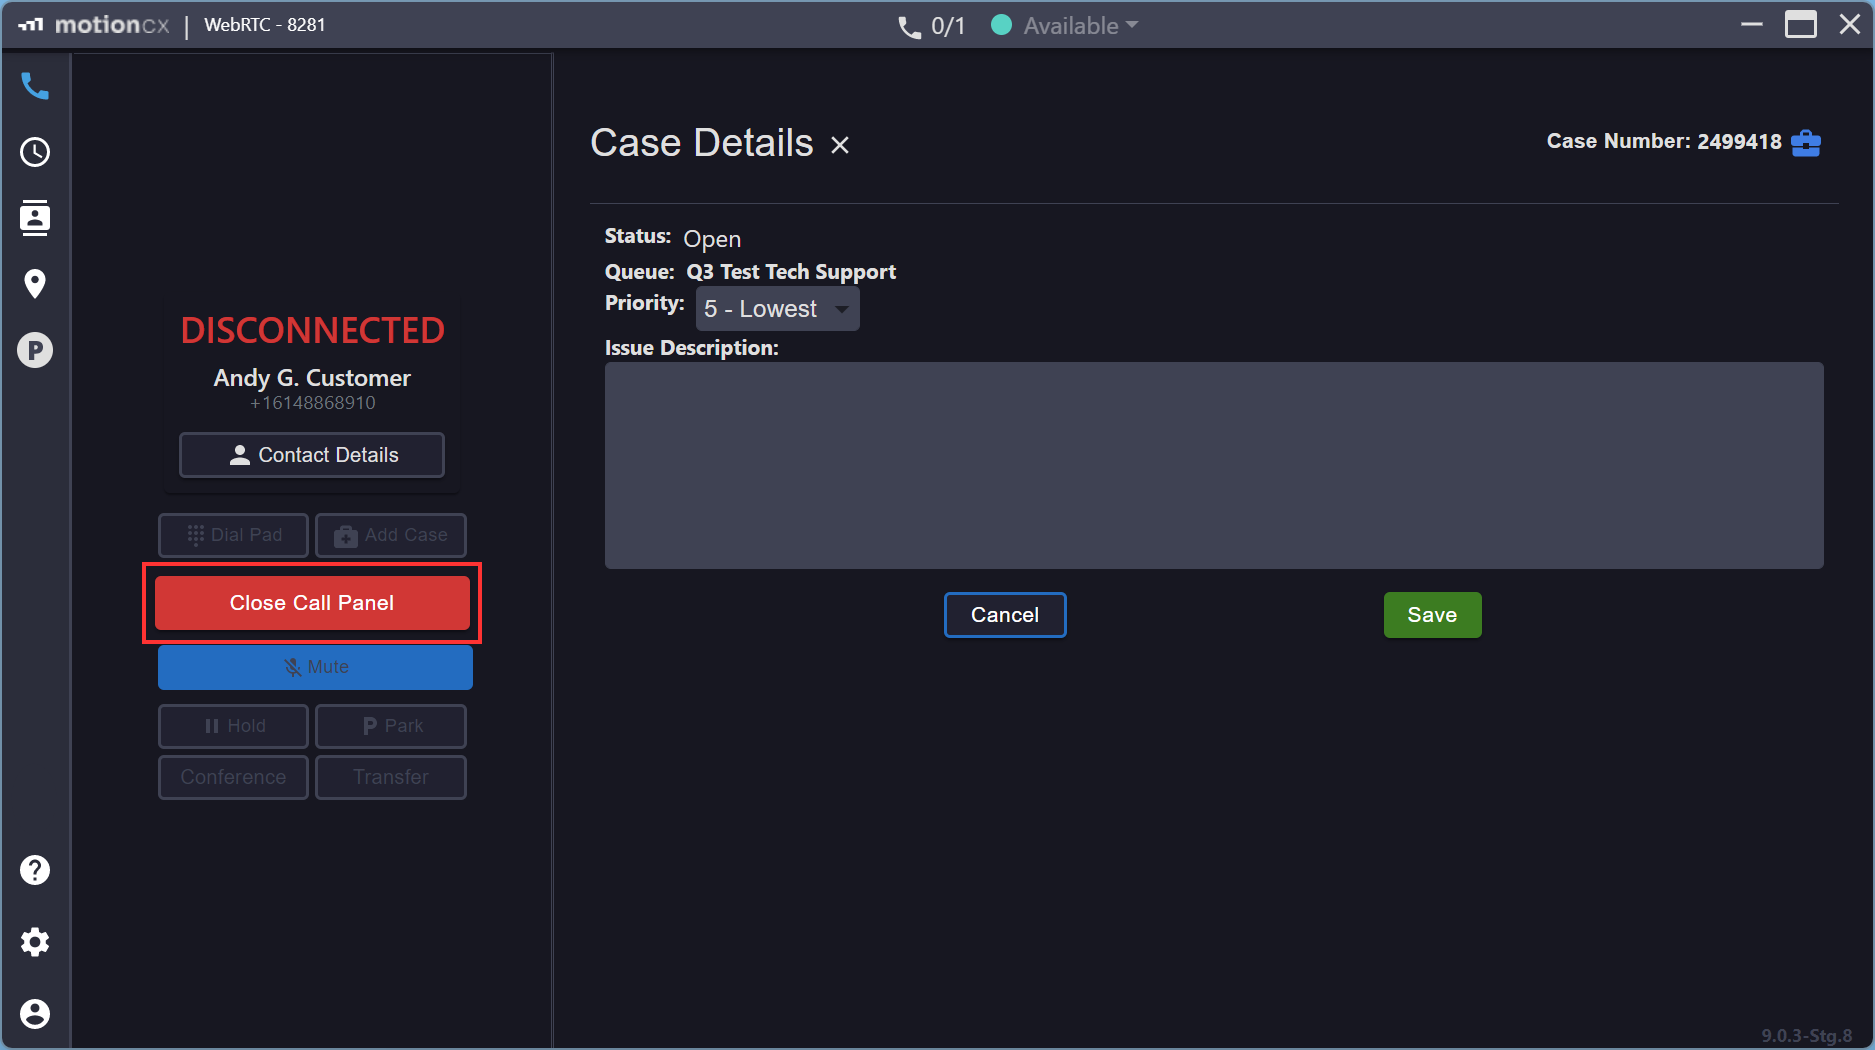
Close Call Panel
If the call panel is not closed prior to receiving another call, a check for unsaved changes will be performed. If no unsaved changes are found, the previous call panel and case form will be closed and the new call panel and case form will be displayed. If unsaved changes are found, you will be notified and have the option to save changes made to the previous case and view the new case, or allowed to continue editing the previous case form. If you choose to continue editing the previous case form you will be taken to the History screen and allowed to complete and save changes to the previous case form while the new call is active. Once finished with the previous case form, you can navigate to the Home screen to view the current call panel and case form.
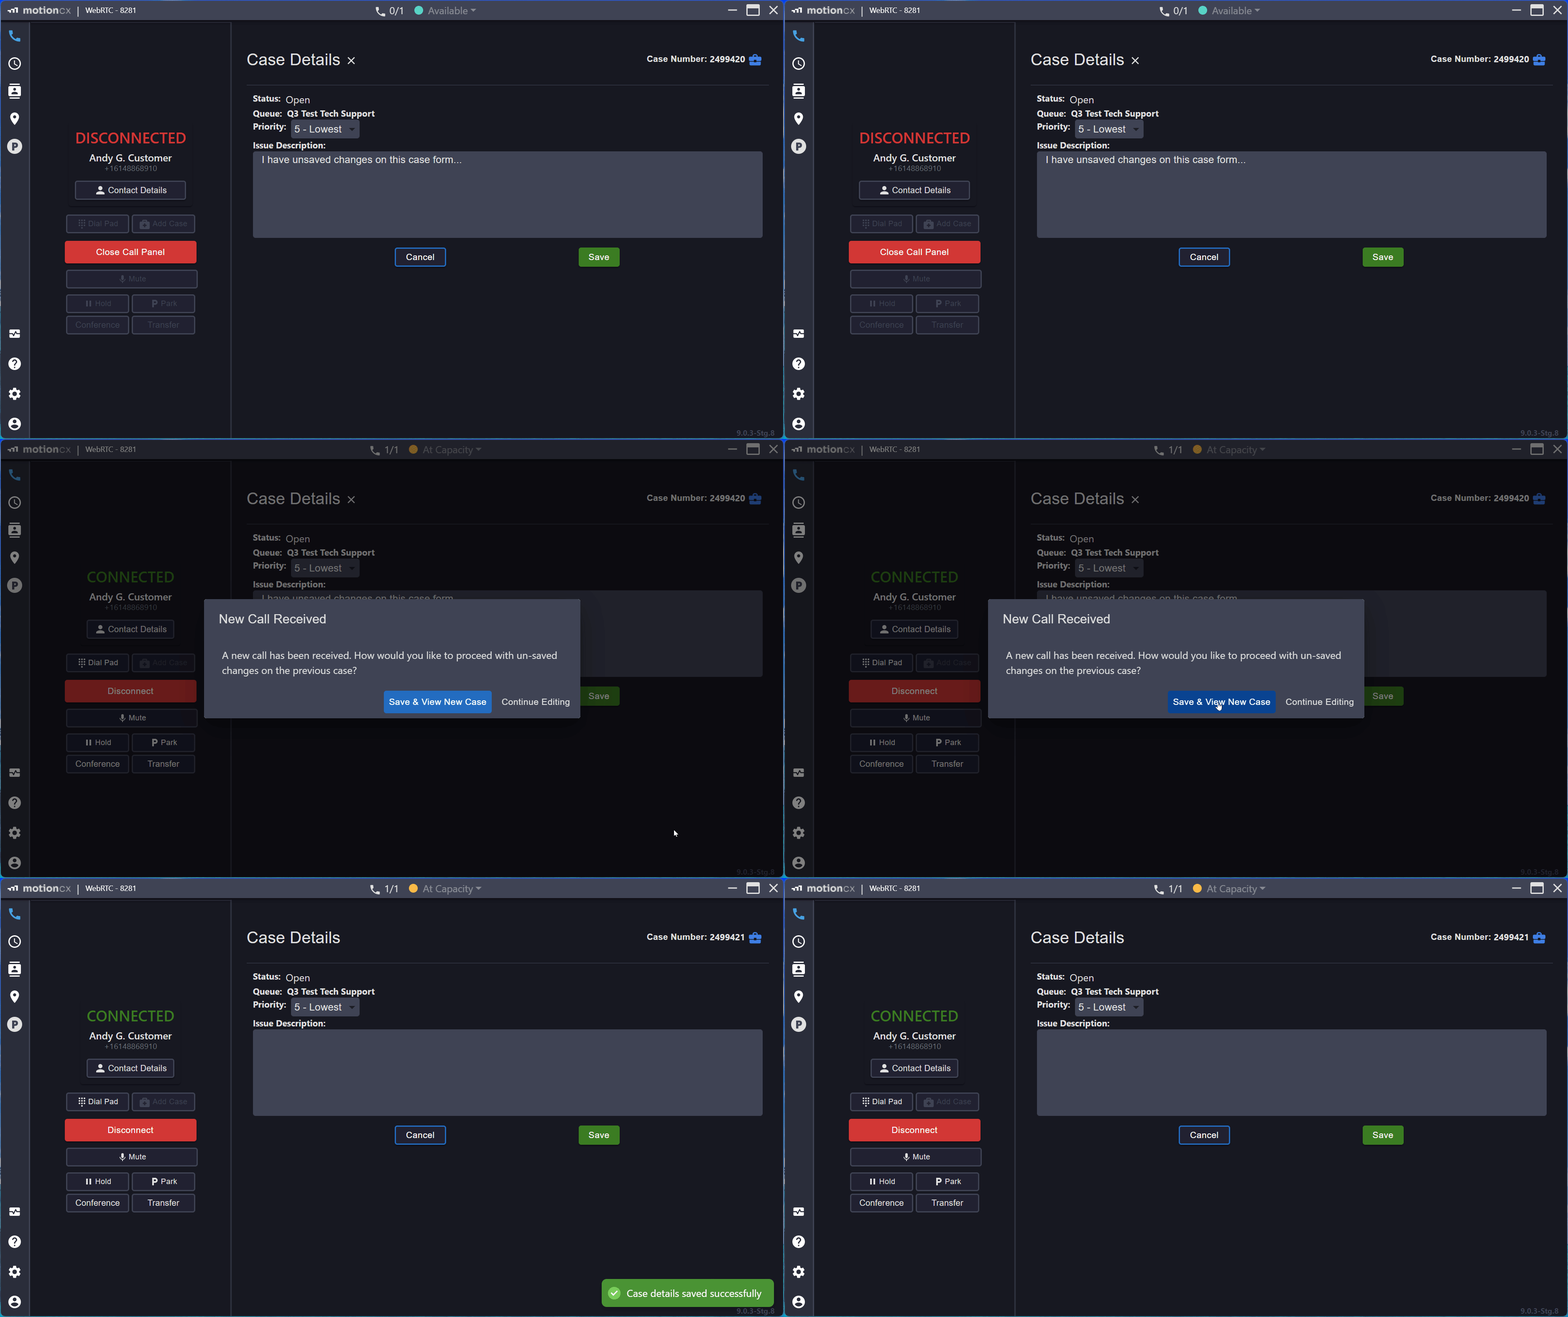
Unsaved Changes
Active Call & CaseNo matter which page you are viewing, an active call will always be displayed in the left side call panel. You can always return to the case associated to an active call by clicking the Home button in the left navigation menu.
Updated 9 months ago
