Response Library
The Response Library is collection of quick responses and support materials that can be shared and referenced by different interaction channels throughout the MotionCX platform. Responses are organized in logical groupings (response folders) to allow for easy accessibility during chat interactions, when making case comments, or as collections of articles on Support Portals. The Response Library is highly customizable and allows for response consistency throughout your organization.
To access the Response Library page, navigate to Administration > General Admin > Response Library from the left navigation menu.
Responses > Add/Edit Responses
To create a new response, click the Add Response button in the right corner of the Responses panel. To edit an existing response, click the Gear button next to a response.
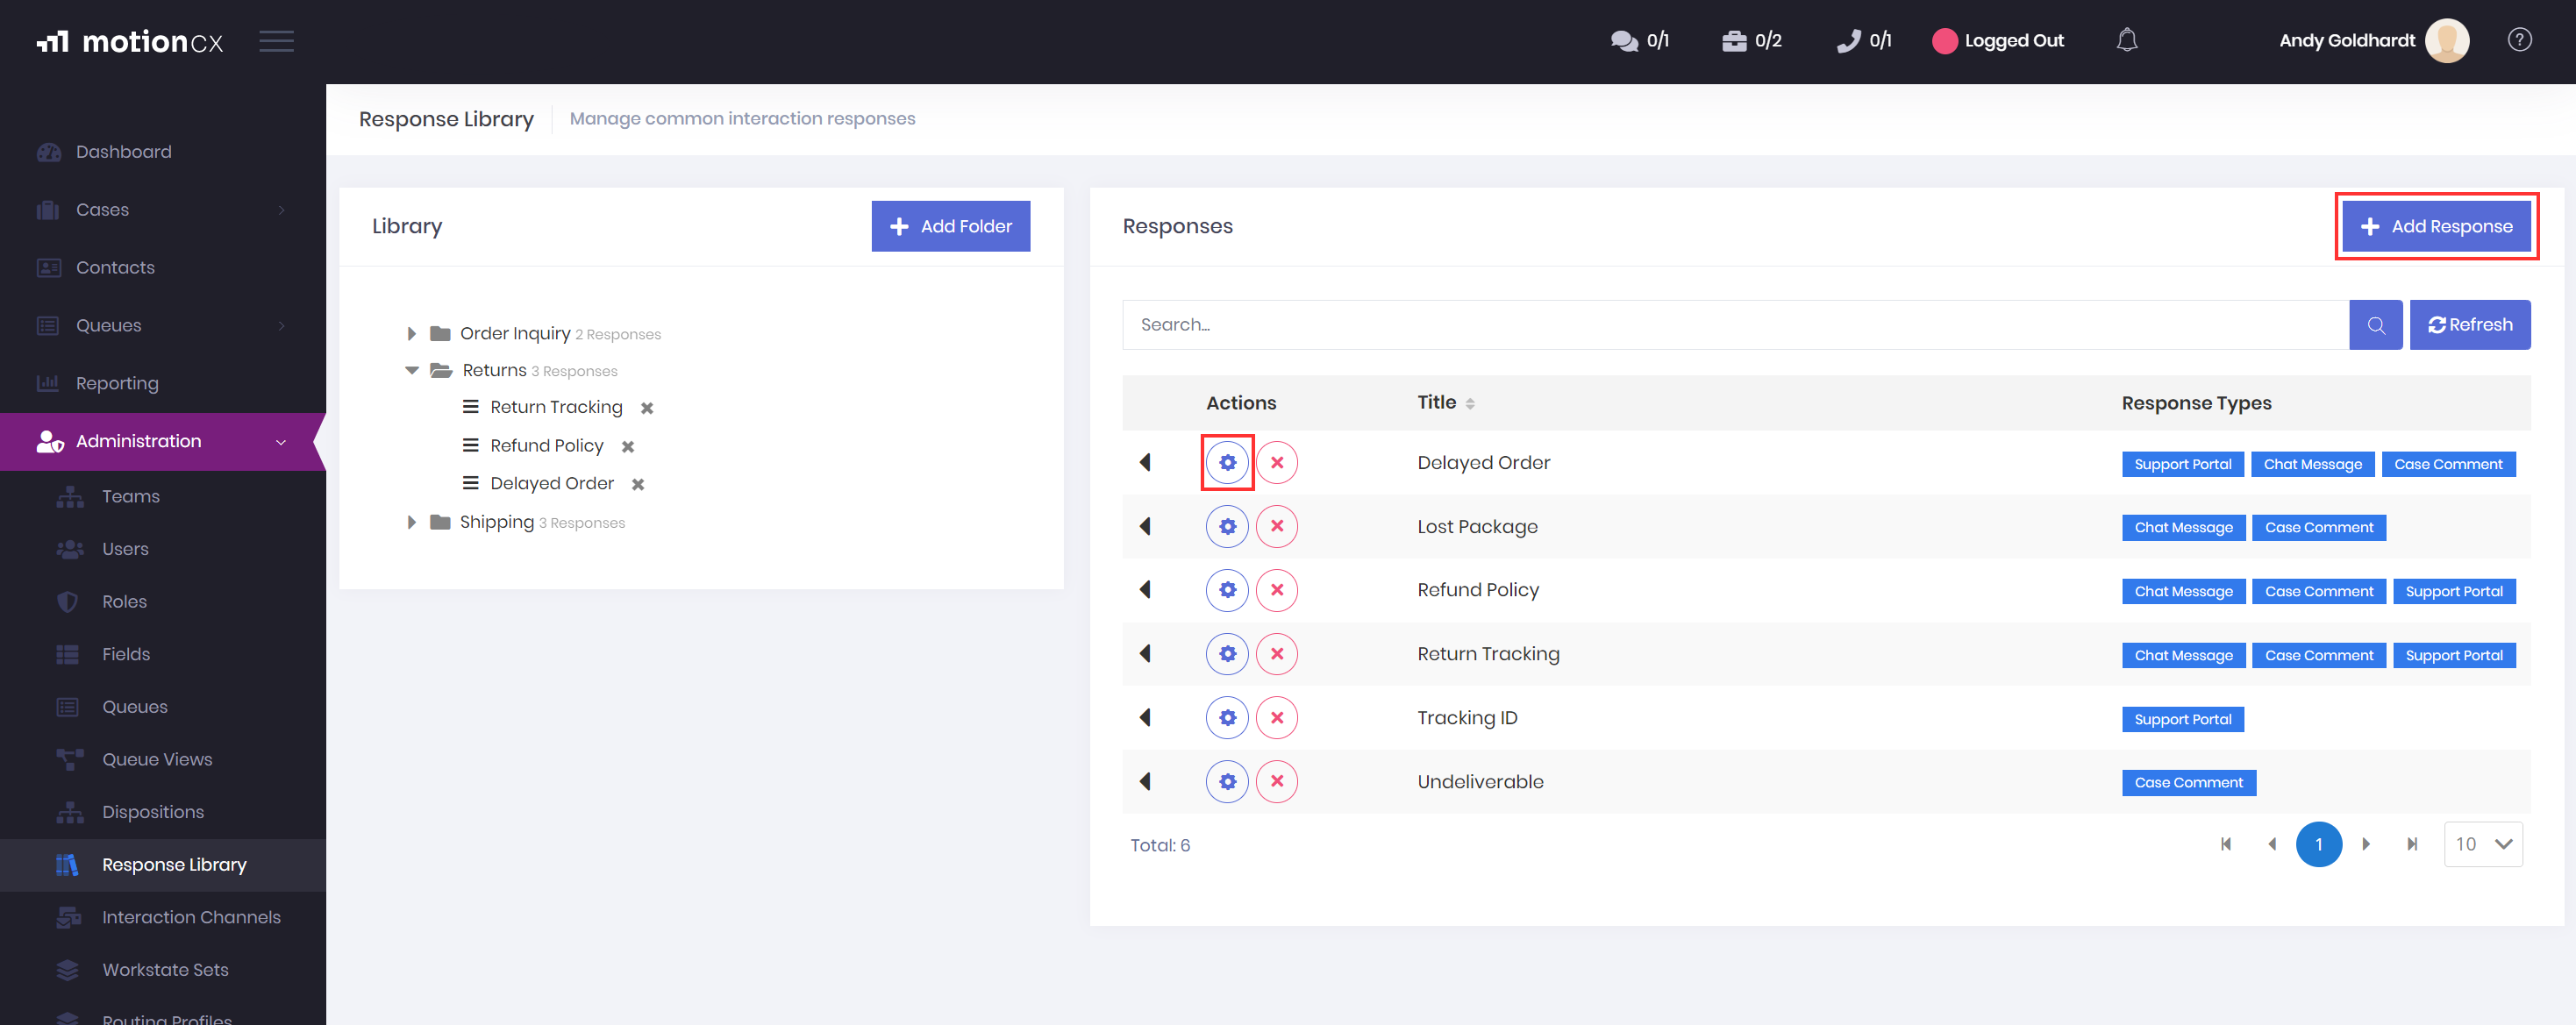
Add/Edit Response
When adding or editing a response, the Title is required.
Support Portal Response TitlesIf a response if being used within a support portal, the response Title will be used as the page header of the article on the support portal webpage.
Response Types
There are three response type options available for selection when creating or editing a repsonse, Chat Message, Case Comment, and Support Portal. A response can be used for one or more response types, and will display the corresponding text editor for each response type when selected. If multiple response types are selected, the editor for each type can be viewed by clicking on the corresponding tab.
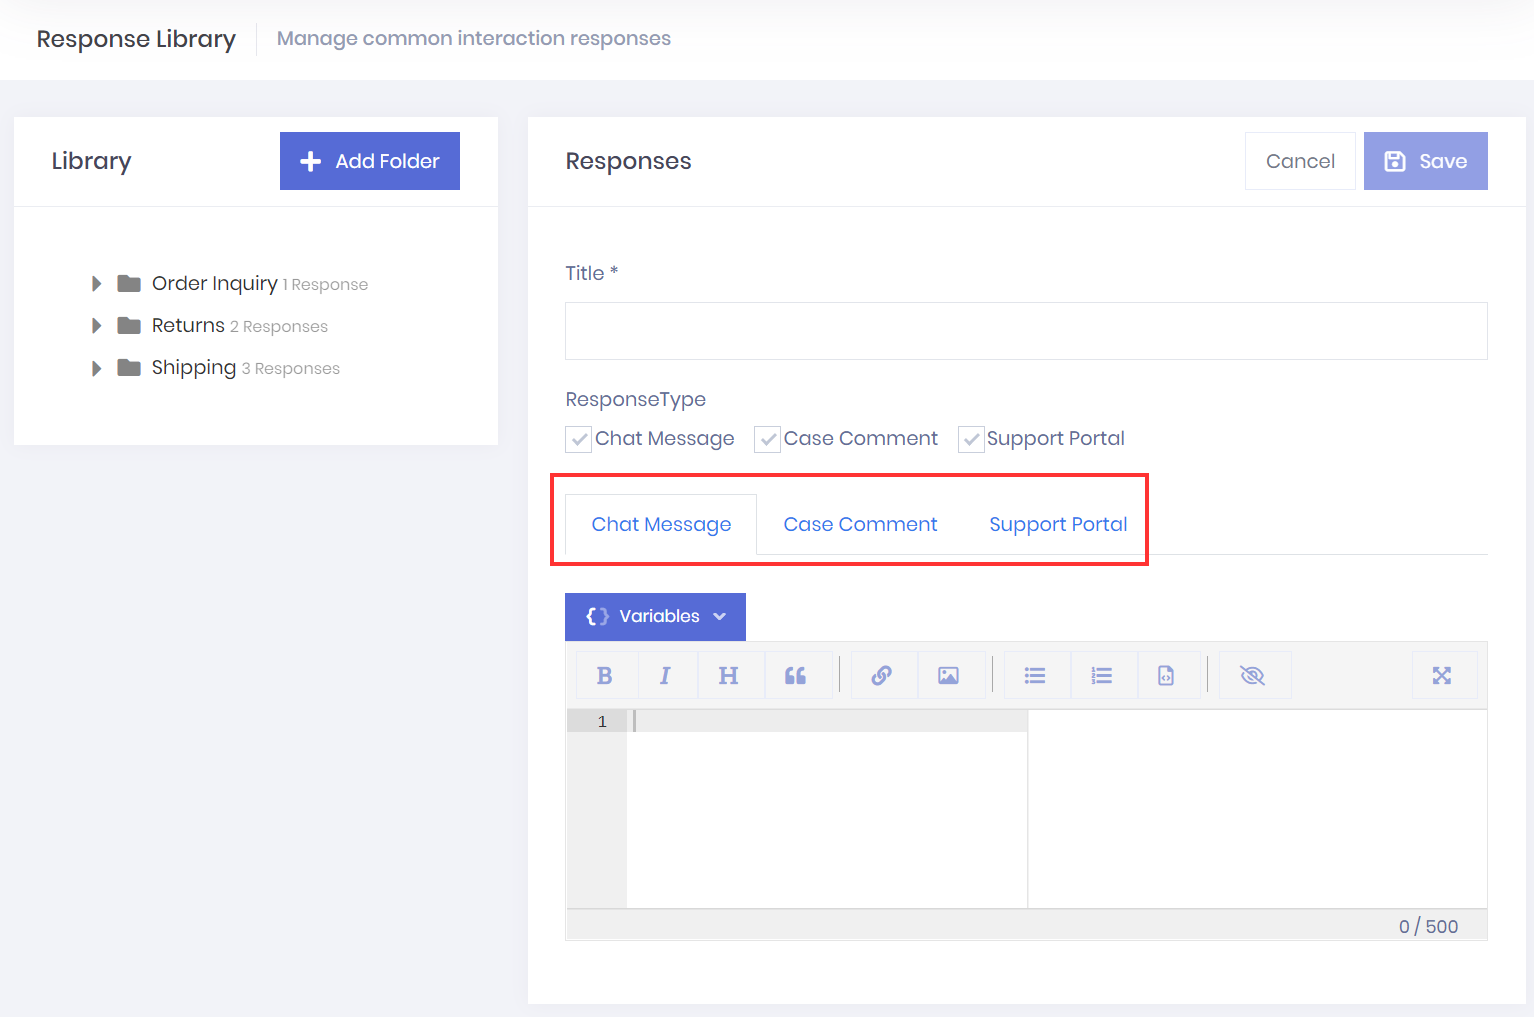
Response Type Tabs
-
Chat Message - If enabled, the response will be available for users to select and insert into chat interactions. The Chat Message response editor allows for basic text formatting to match acceptable formatting within the chat client.
-
Case Comment - If enabled, the response will be available for users to select when commenting on a case. The Case Comment response editor allows for rich text formatting that is acceptable for comments and emails generated from comments.
-
Support Portal - If enabled, the response will be available for users to search and view on support portals. When the Support Portal response type is enabled, an additional option is available to enable the specific support portal(s) for which the response should be displayed on. The Support Portal response editor allows for rich text, images, videos, and other HTML acceptable formatting.
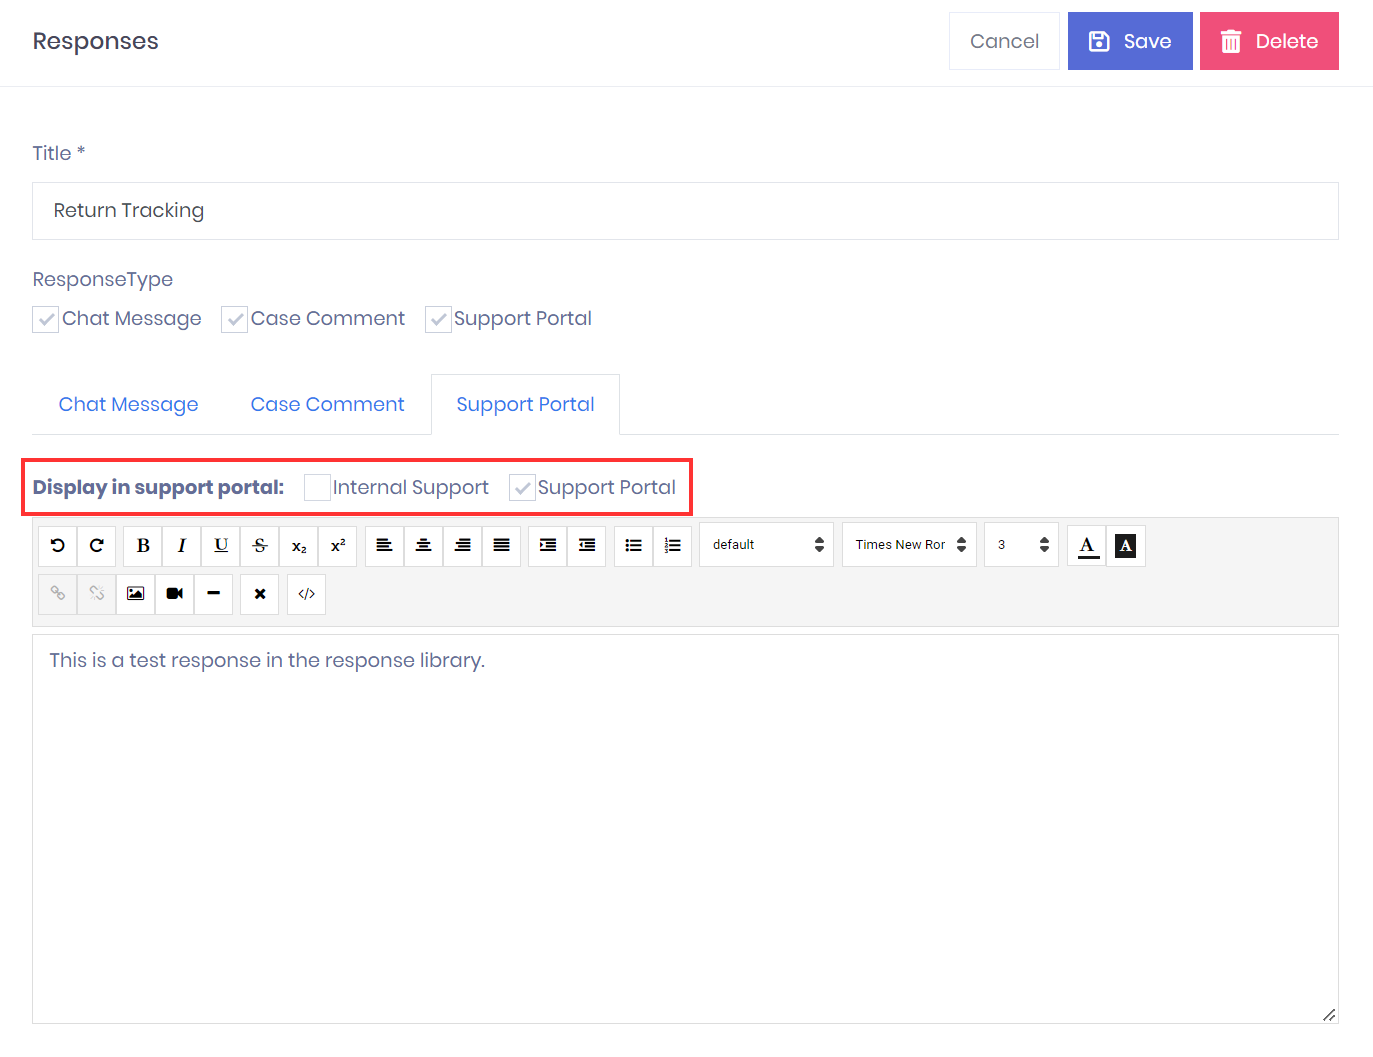
Support Portal Selection
Response Type Variables
For responses with a response type of Chat Message or Case Comment, variables are available to include within the response. Data for the variables will be pulled from the case being worked and automatically populated when the response is used.
To add a variable into a response, place the cursor within the text editor to where you would like the variable to appear, click the Variables button, then select the variable that you would like to use.
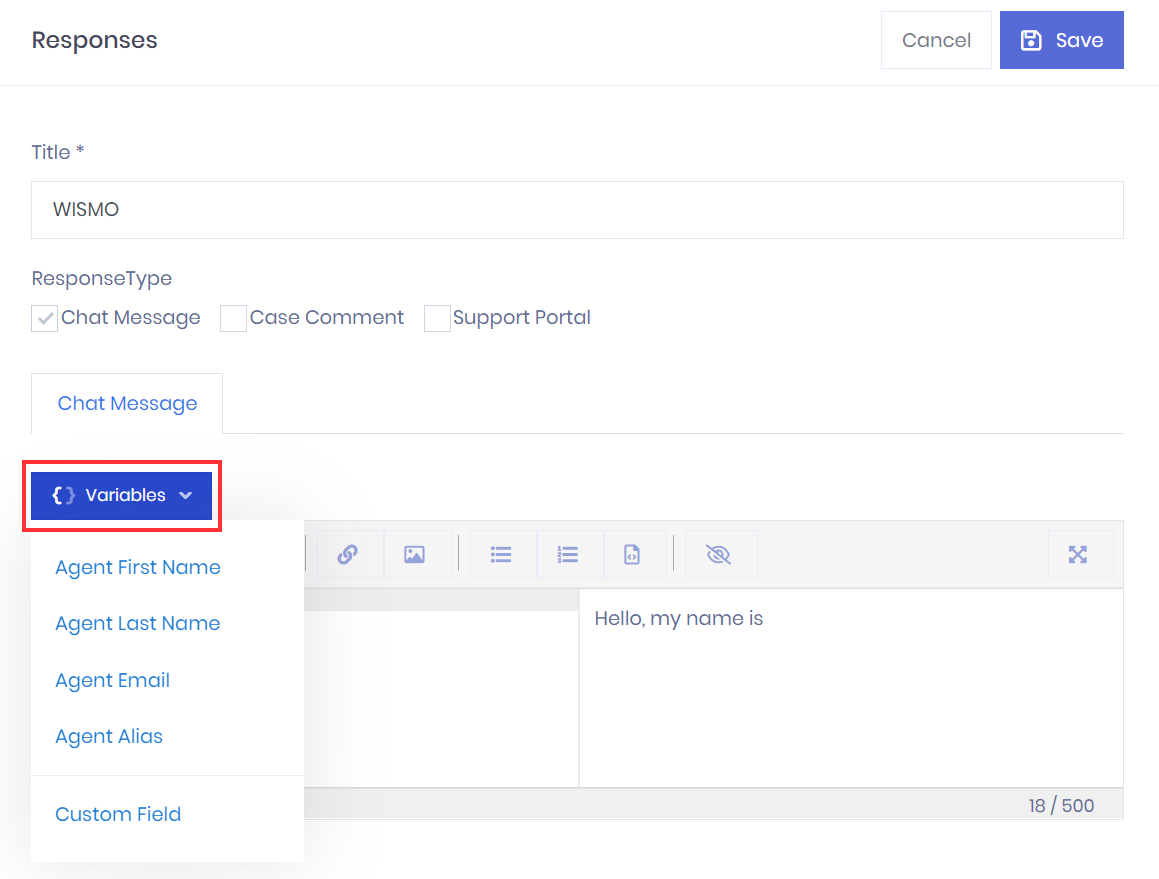
Response Variables
Responses > Delete Responses
To delete a response, click the X button next to the response title in the Responses list. The response will be deleted from all response types associated to the response.
Library > Add/Edit Libraries
For a response to to be visible within its corresponding response type, it must be included in a response library. Response libraries are displayed in the left Library panel. Clicking on a library will expand it to list all responses within the library.
To create a new response library, click the Add Folder button within the Library panel. To edit an existing response library, right click on the library and click Edit.
Name - The Name field is required and will be displayed as the library name when users are selecting responses for chat interactions and case comments. On support portals, the Name will be used as a category displayed on the main page of the support portal.
Description - The Description can be used on support portals to describe the list of responses contained within the library. The description editor allows for rich text, images, videos, and other HTML acceptable formatting.
Icon - Along with the library Name, an icon can be displayed on the main page of the support portal. The icon must be accessible via a web address. To use an icon, enter the full web address of where the icon is located.
Library > Add/Remove Responses
To add a response to a library, click and drag the response from the responses panel to the desired library and release. Responses can be added to one or more libraries.
To remove a response from a library, click on the library to expand it, then click the X button next to the workstate.
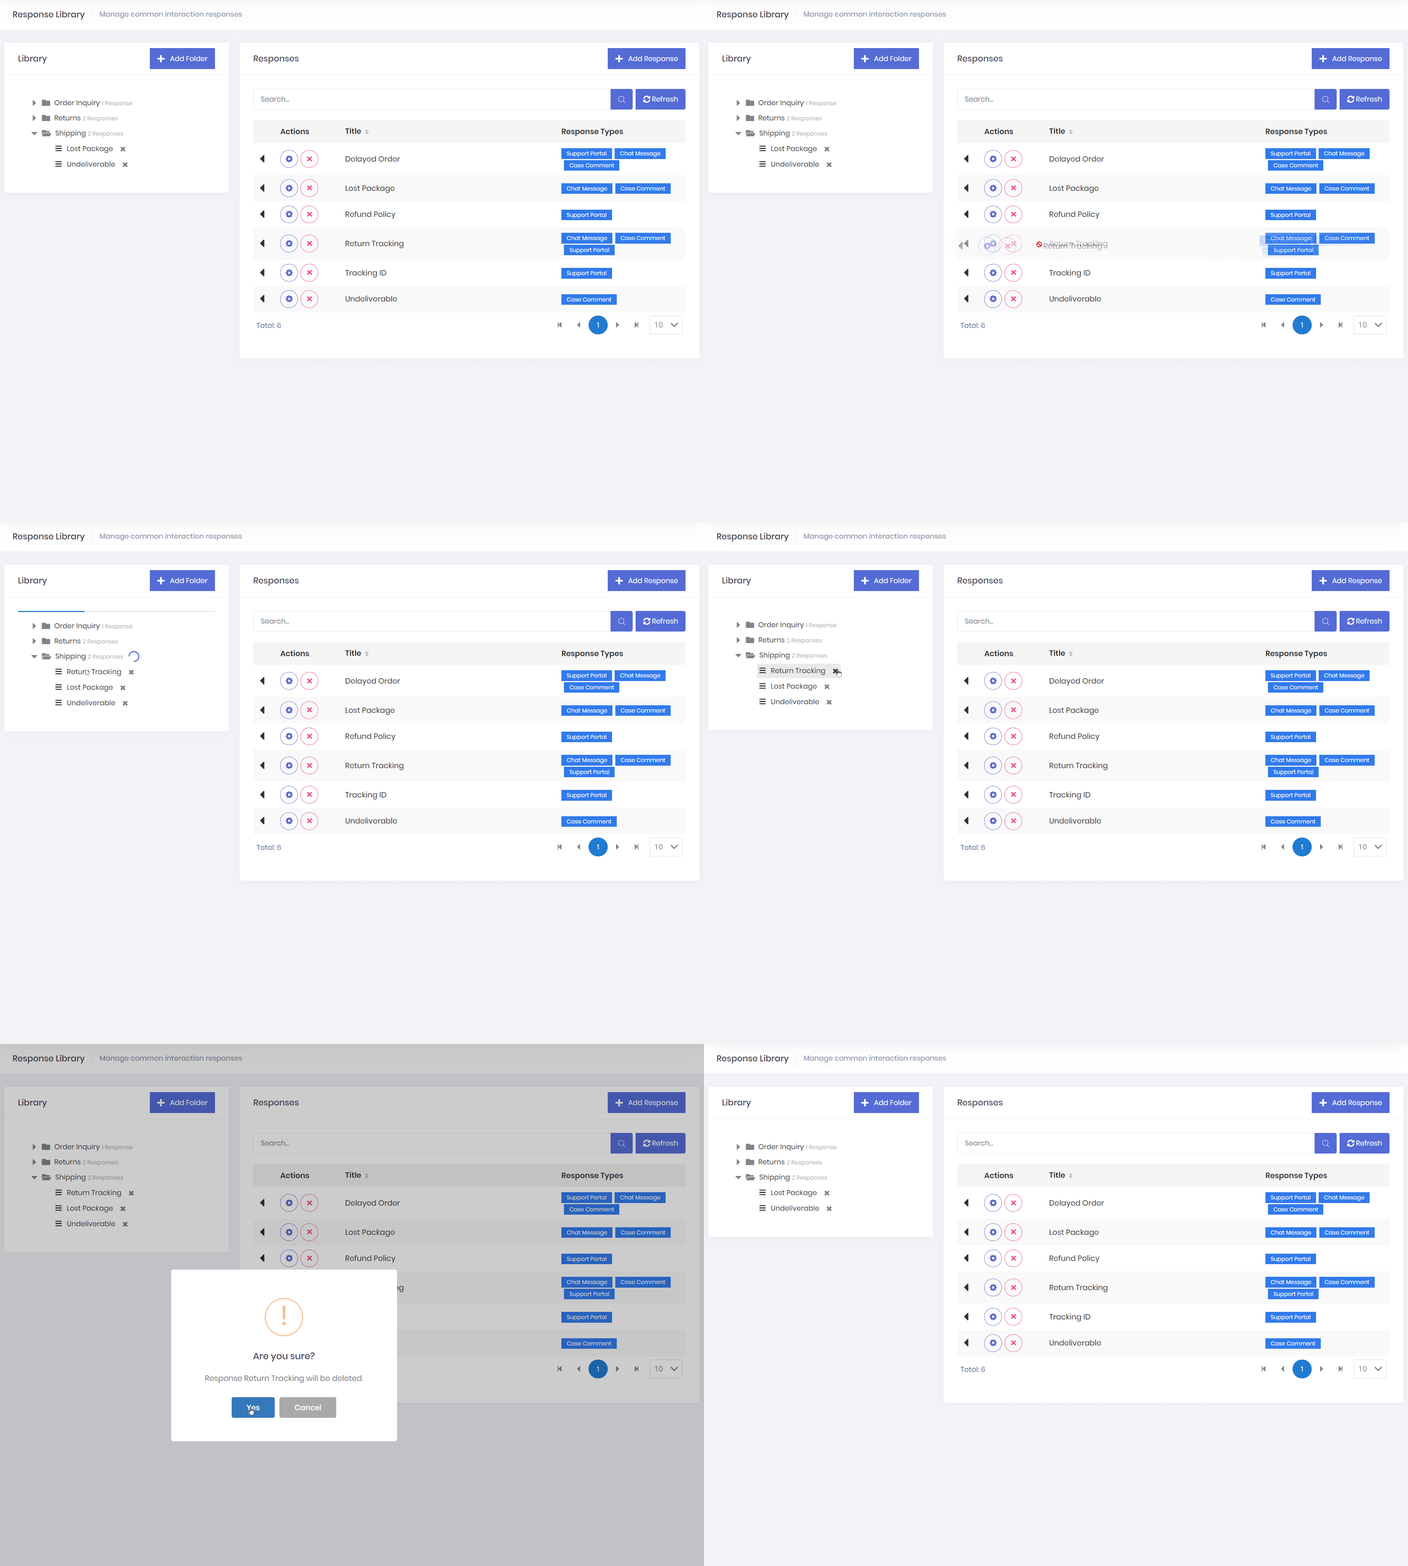
Add/Remove Responses
Library > Response Ordering
The order in which responses are displayed under their library will be reflected when users are selecting the responses for chat interactions and case comments, as well as the order displayed on support portals. To order responses, left click and hold the move icon to the left of the response, then drag the response to it's desire location and release.
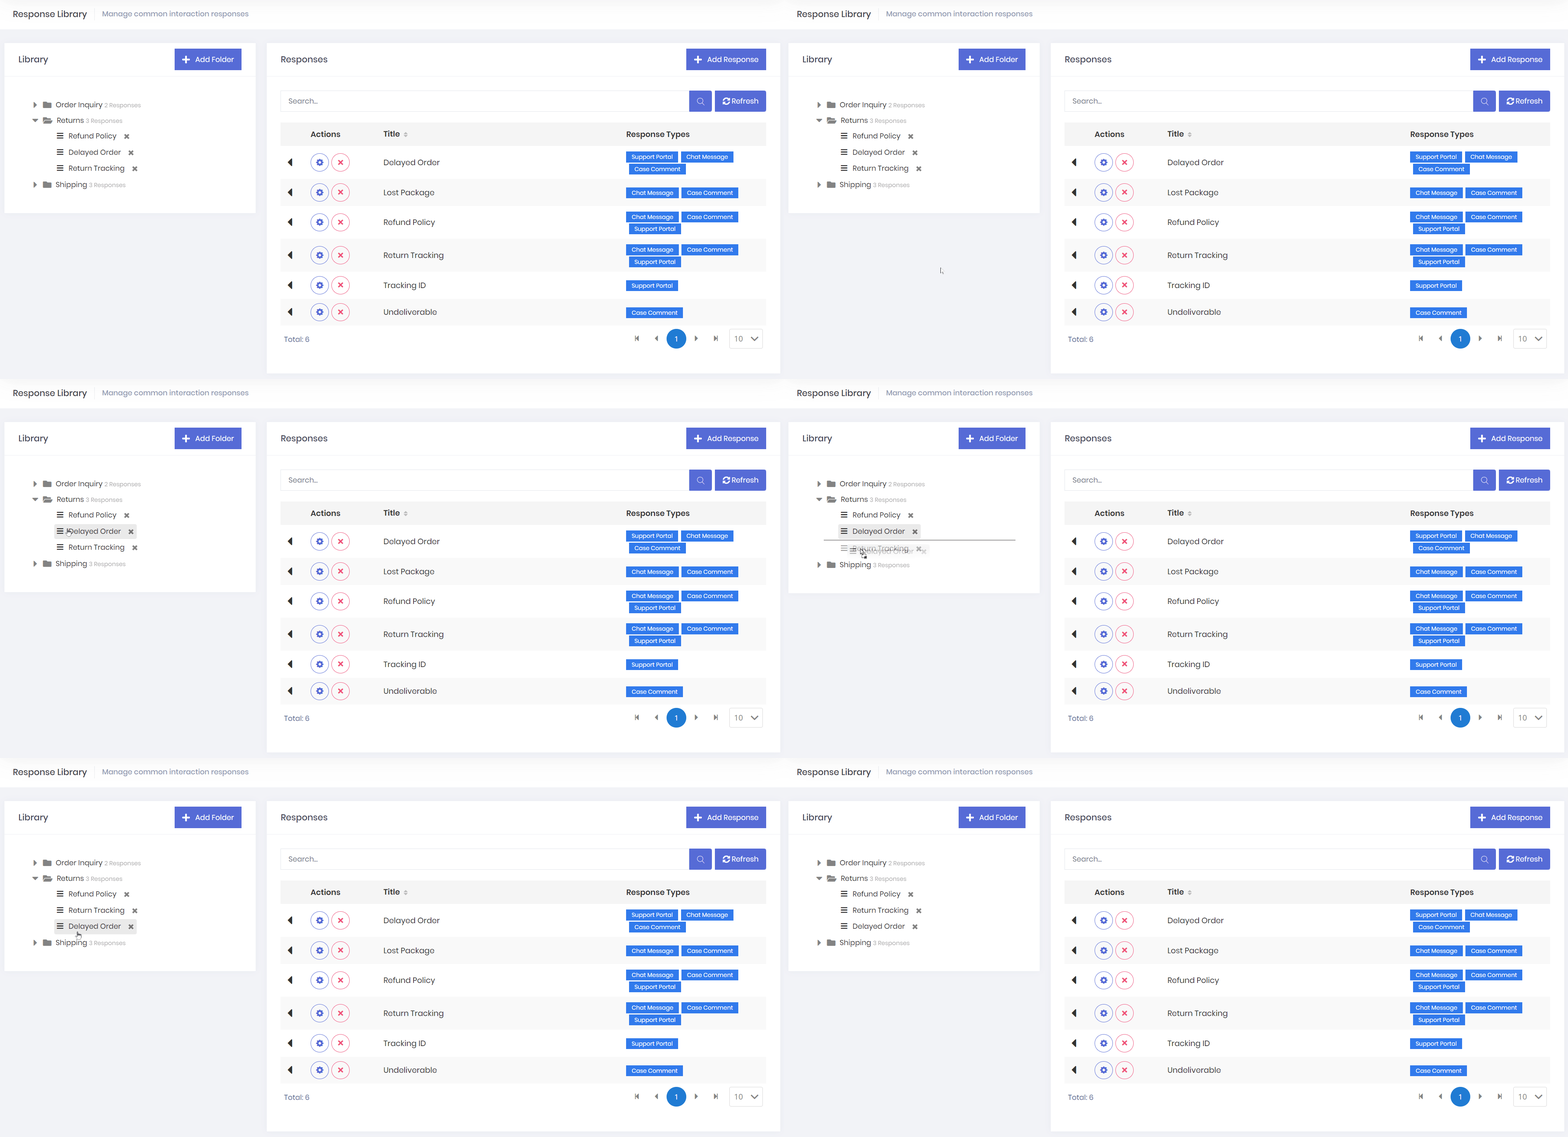
Ordering Responses
Library > Delete Library
To delete a response library, right click on the library and click Delete.
Updated 9 months ago
