Fields
While case forms (tickets) in MotionCX have a set of default fields used to capture basic information, it may be beneficial for your organization to capture additional information specific to your needs. The Fields administration page allows you to setup custom fields on your case forms. These custom fields can be set to display on one or more queues, and each queue case form may contain one or more custom fields.
To create custom fields, navigate to Administration > Case Admin > Fields from the left navigation menu.
Add/Edit Fields
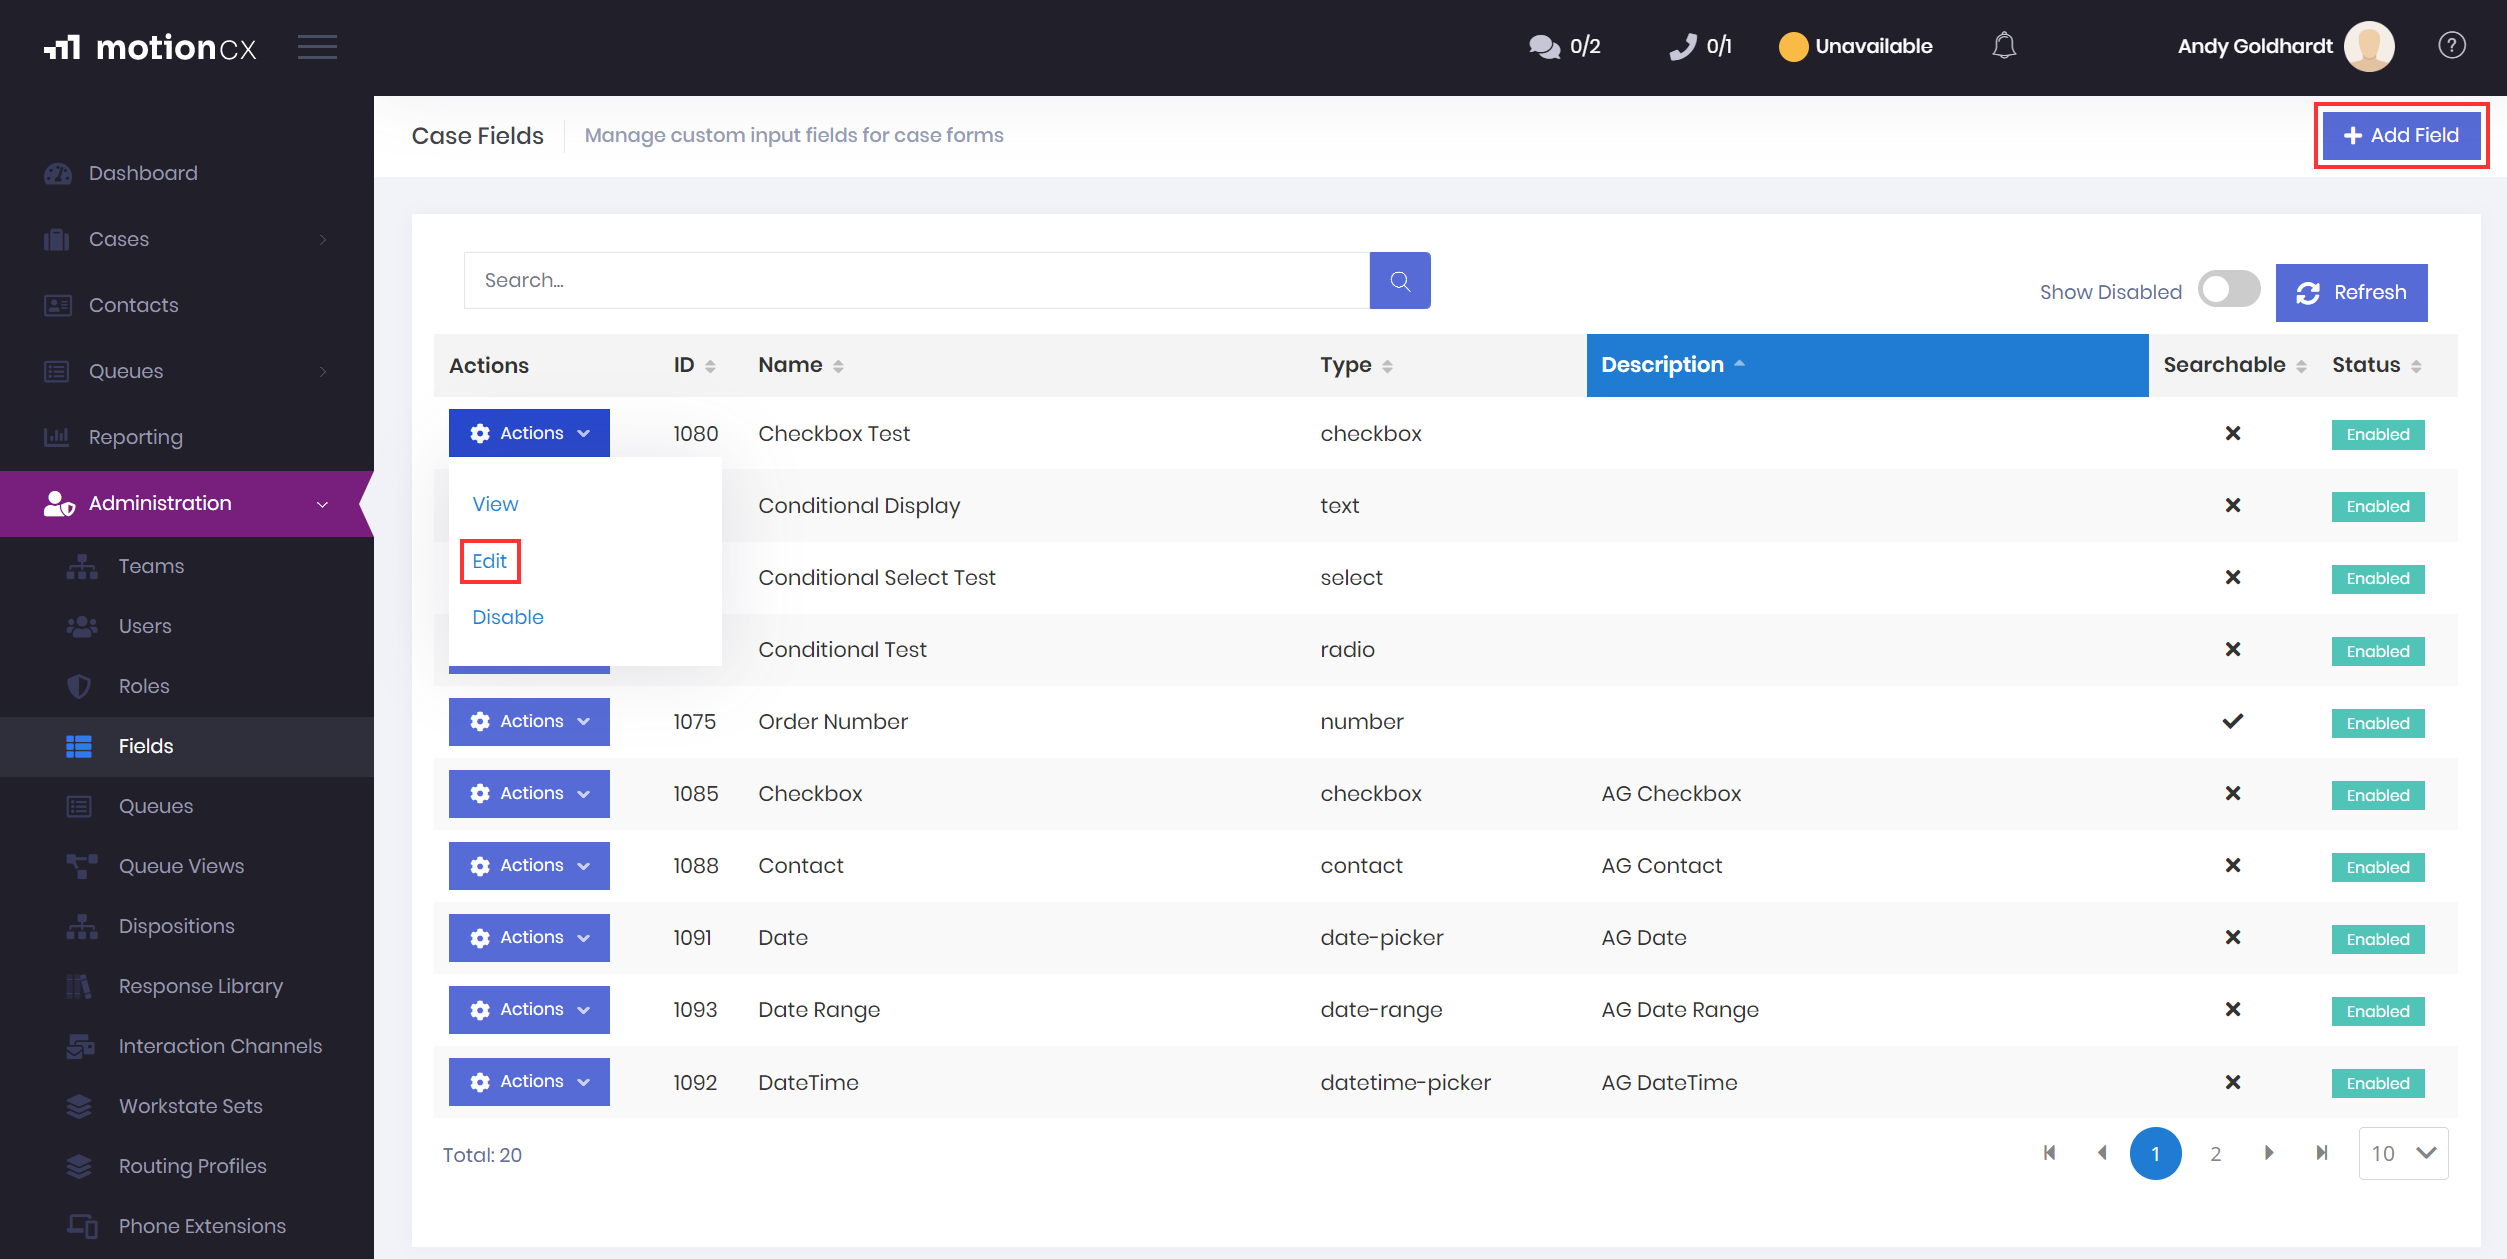
To create a new field, click the Add Field button in the top right corner of the Fields page. To edit an existing field, click the Actions button next to the field, and select Edit.

Create And Edit Fields
The Create/Edit Field window will consist of two or three tabs, depending on the Field Type selected: General, Assigned Queues, Field Values*
Add/Edit Fields > General
The General tab is where identifying field information is captured. Name and Field Type are required.
-
Name - A friendly name for the field that will be displayed on the case form.
-
Description - An option description of the fields use.
-
Field Types - There are several options available for field types. The field type you select is dependent on the type of data you would like to collect, as well as how you would like the user to interact with the field on the case form. See Field Types below for details on each type.
-
Searchable - If enabled, the field will be searchable on the All Cases search screen. Only certain field types can be made searchable. Refer to the Field Types list below.
-
Show In Public Form - If enabled, the field will be displayed to external users when a case form from is accessed on a Support Portal.
-
Add/Edit Fields > Assigned Queues
The Assigned Queues tab includes a count of assigned queues. Assigning a queue to a field will display that field on the case form when creating and editing a case for that queue. Multiple queues can be assigned to use the same field.
-
Add/Edit Queue - To assign a queue, click the Add Queue button. To edit an existing assigned queue, click the Gear button next to the queue.
- Queue - The queue dropdown allows you to select the queue in which you would like the field to be assigned to.
- Required - If enabled, a value will be required for the field on the case form before the case can be saved.
-
Remove Queue - To remove the field from a queues case form, click the X button next to the queue.
Add/Edit Fields > Field Values
The Field Values tab includes a count of the field values, and will only display if the Field Type selected is a type that supports selectable values. Field values will display on the case form as options for the field.
-
Add/Edit Field Values - To add a new field value, click the Add Value button. To edit an existing field value, click the Gear button next to the value.
-
Remove Field Values - To remove an existing field value, click the X button next to the value.
Field Types
Field Type | Description | Selectable Values | Conditional | Searchable |
|---|---|---|---|---|
text | Single line field allowing free-entry of text, numbers, and symbols | ❌ | ❌ | ✅ |
textarea | Multi-line field allowing free-entry of text, numbers, and symbols | ❌ | ❌ | ✅ |
select | Single select dropdown list | ✅ | ✅ | ❌ |
radio | Single select list | ✅ | ❌ | ❌ |
checkbox | Multi select checkboxes | ✅ | ❌ | ❌ |
multiselect | Multi select list using click, click+shift and click+ctrl functionality | ✅ | ❌ | ❌ |
contact | Search and select system contacts | ❌ | ❌ | ❌ |
number | Single line field allowing numeric values only | ❌ | ❌ | ✅ |
time | Hour and minute time selector | ❌ | ❌ | ❌ |
date-picker | Calendar date selector | ❌ | ❌ | ❌ |
datetime-picker | Calendar date/time selector | ❌ | ❌ | ❌ |
date-range | Calendar date start and date end selector | ❌ | ❌ | ❌ |
datetime-range | Calendar date/time start and date/time end selector | ❌ | ❌ | ❌ |
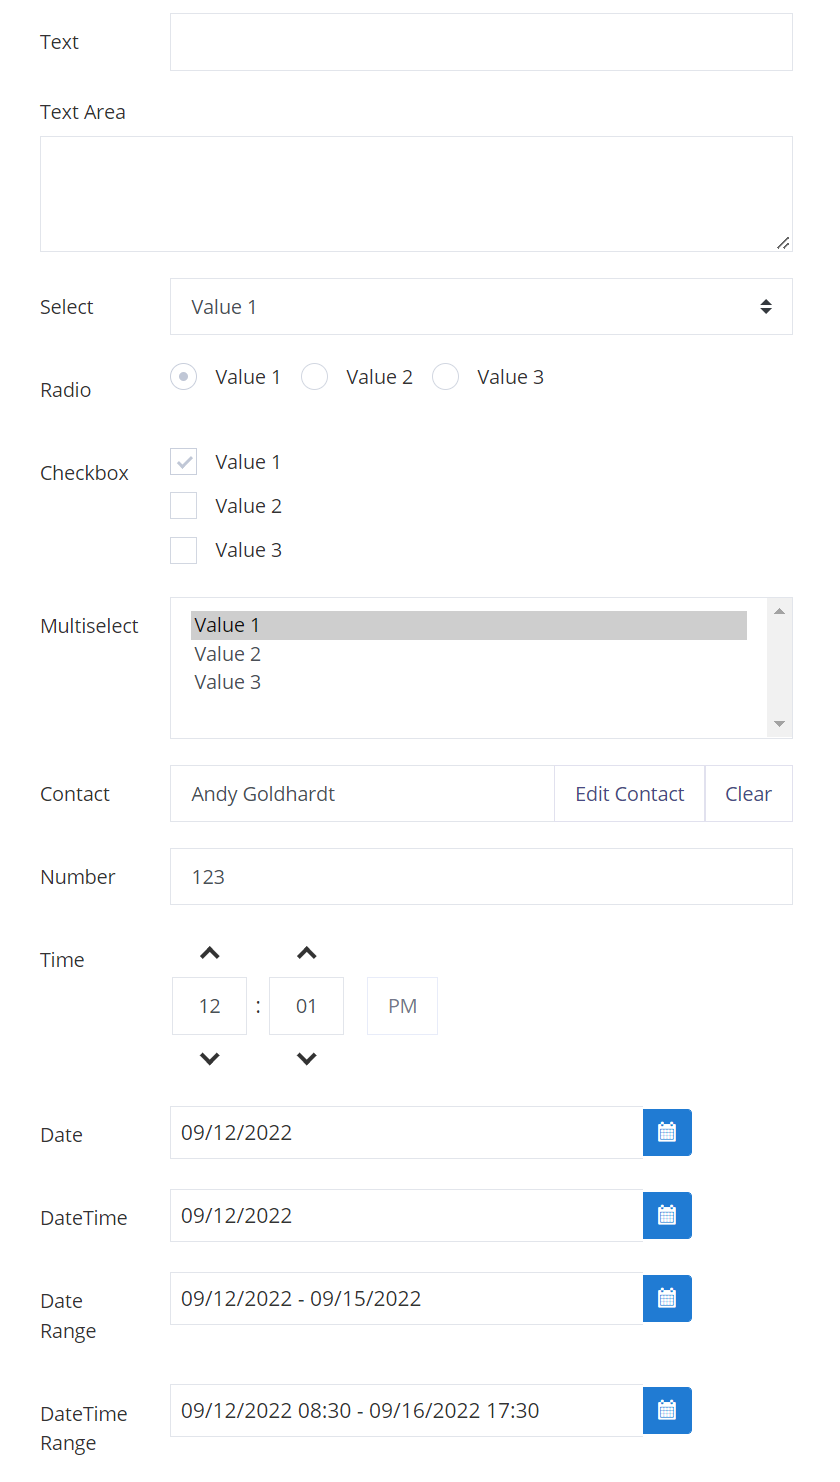
The screenshot below gives an example of what each field type will look like on the case form screen when creating or editing a case.

Field Type Examples
Conditional Fields
Custom fields with a field type of Select allows for conditional field values. This allows the ability to show and hide fields based on a users selection.
Example |
|---|
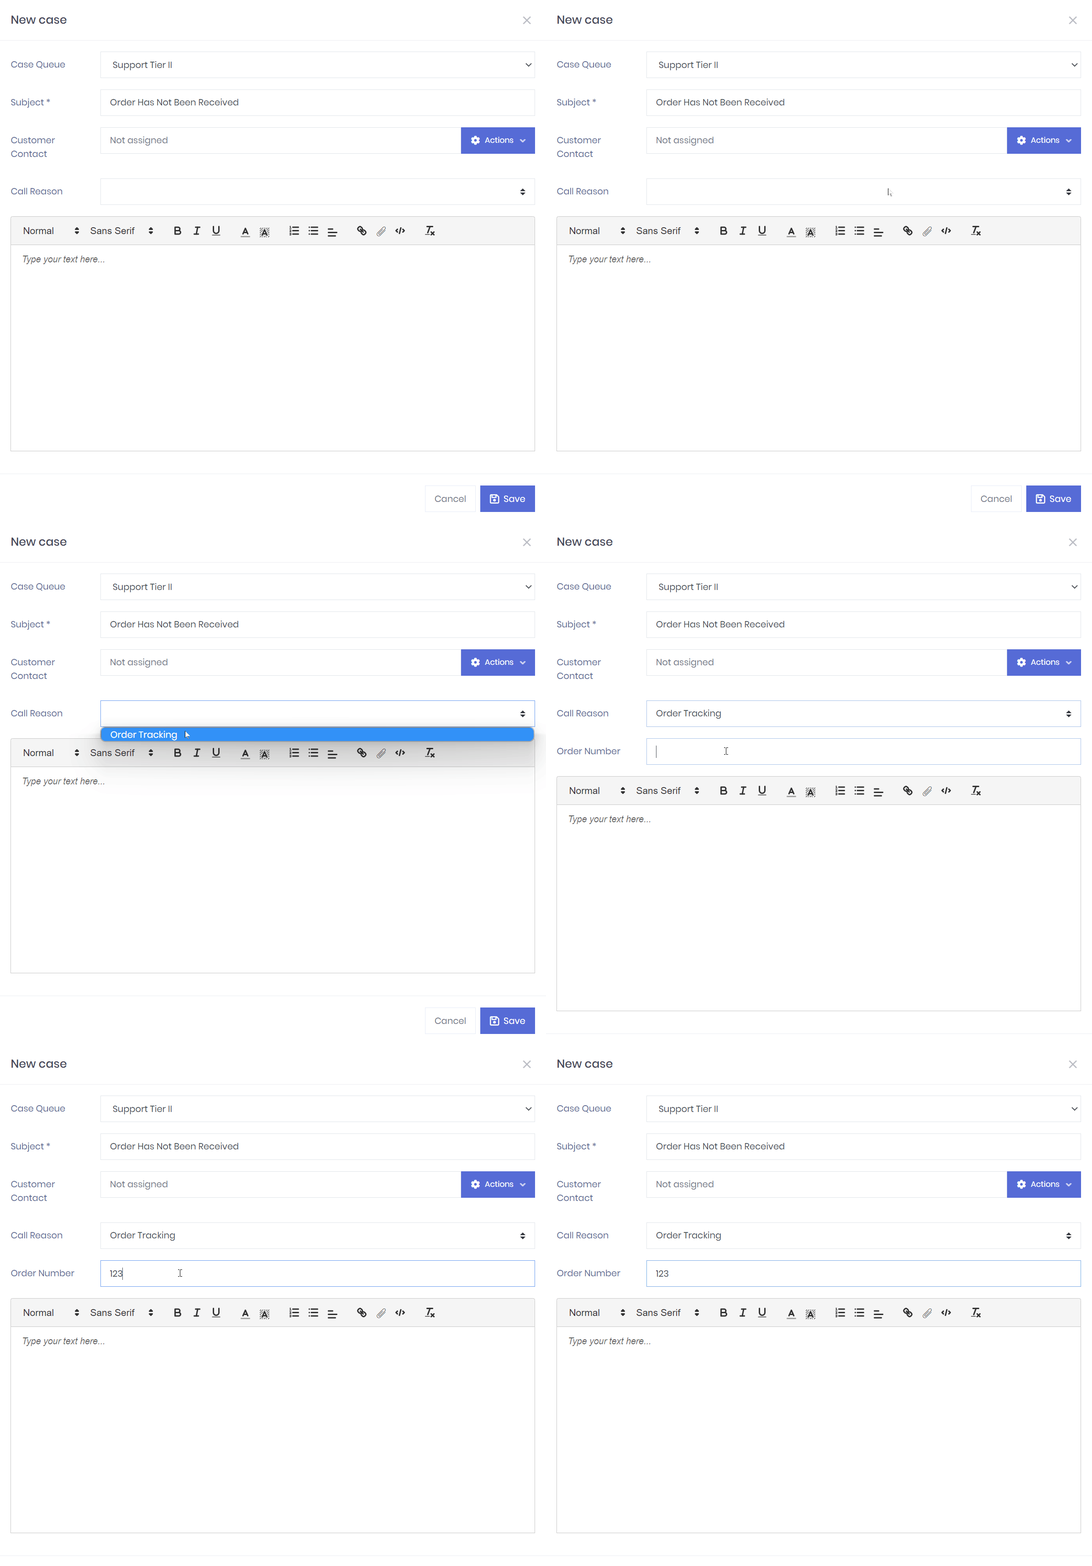
If you have a custom field to capture Call Reason, and one of your field values is 'Order Tracking', you may want to create a conditional field that can capture 'Order Number' when 'Order Tracking' is selected. |
To create conditional fields, first you must create the field that will be displayed if the condition is met. In the example above, you would need to create a field named 'Order Number' with Field Type of number and assign it to the desired queue. Then, you will need to create a field named 'Call Reason' with Field Type of Select. On the Field Values tab you will want to add a value with name of 'Order Tracking' and check the Conditional checkbox. This will allow you to select the 'Order Number' field from the dropdown to be displayed if 'Order Tracking is selected'. Clicking Save on all windows will then enable the conditional field on the assigned queue.

Conditional Field Example
Deprecated Fields
If you have an existing custom field that you no longer wish to be editable on the case form, but would like to have it remain as a view only field, the deprecated field type should be used.
To deprecate a field, locate the field on the Case Fields list and click the Actions button, then select Edit. Change the Field Type to deprecated and click the Save button. Even though the Field Type is changed when deprecating a field, the original data and data format will be retained.
To re-instate a deprecated field, simply edit the field and select it's original Field Type and save.
Disable Fields
If you have an existing custom field that you no longer wish to be editable or viewable on the case form, the disabled functionality should be used.
To disable a field, locate the field on the Case Fields list and click the Actions button, then select Disable. This will automatically disable the field.
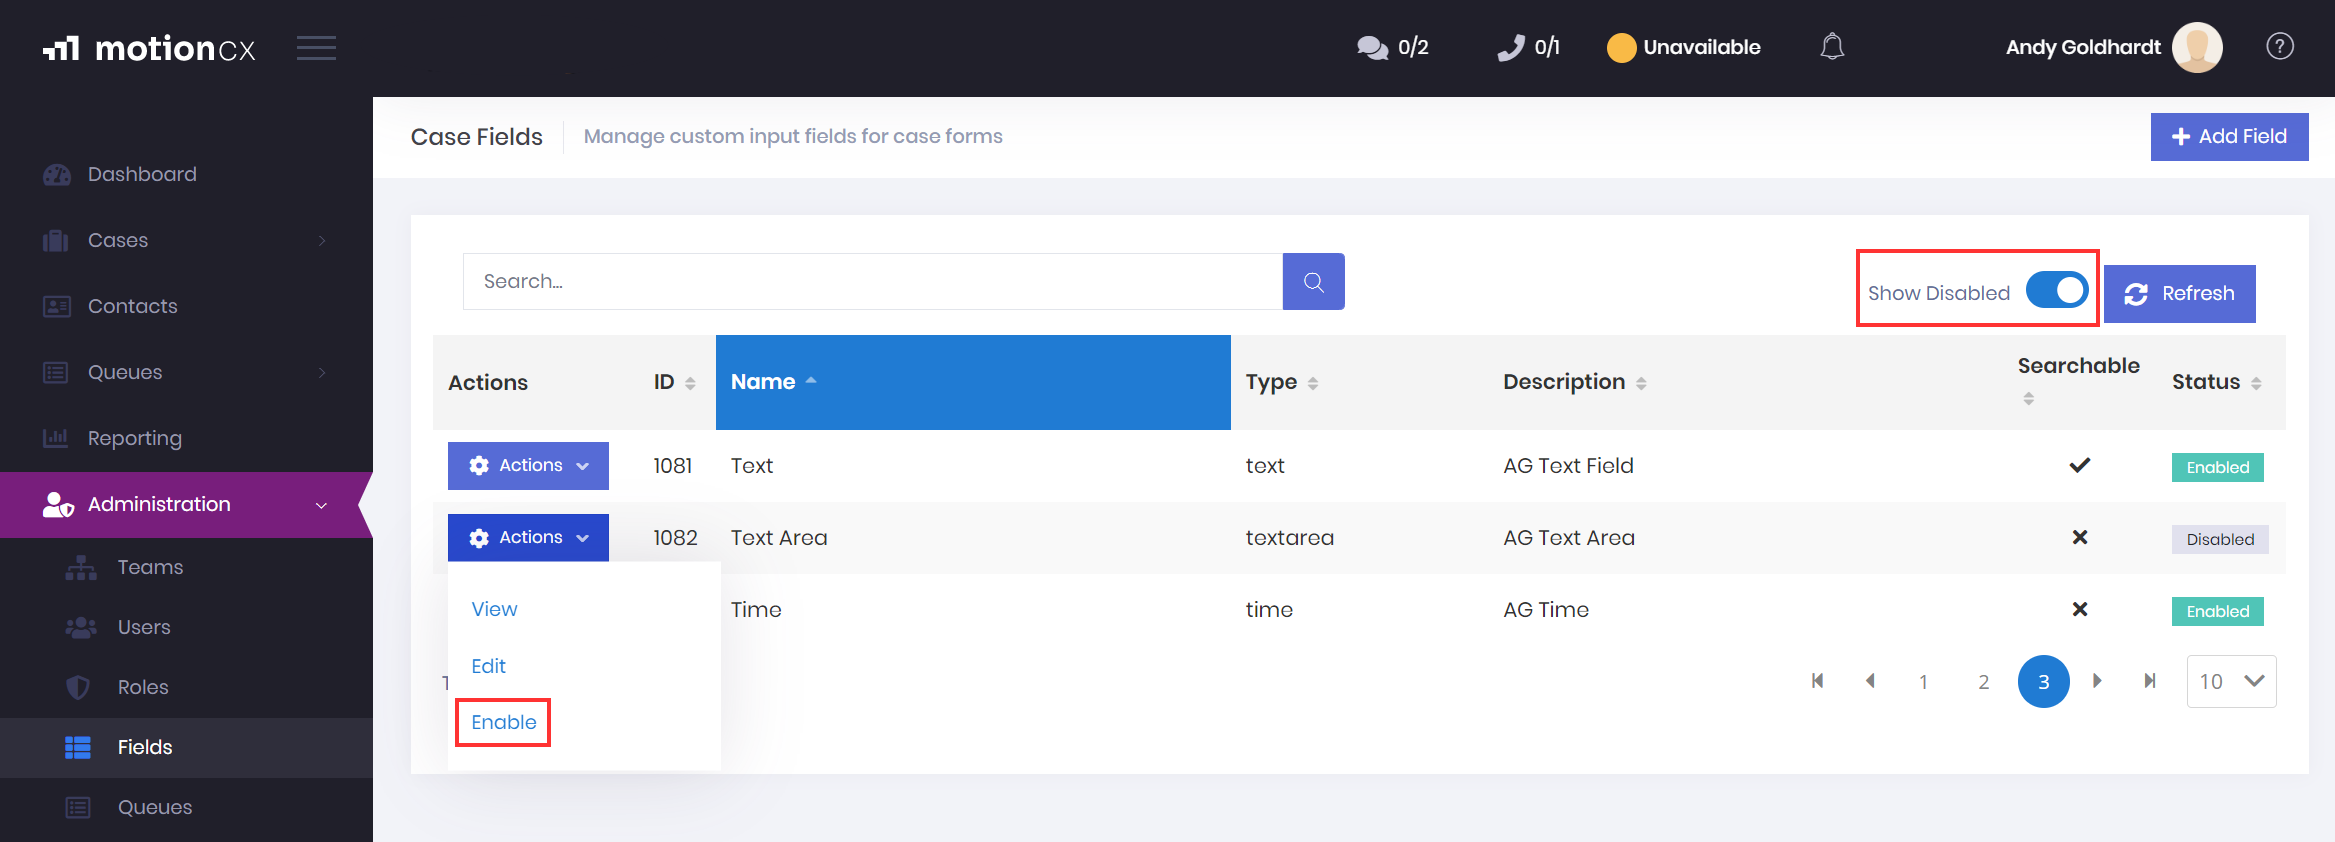
When fields are disabled, the original data and data type is retained in the database. If you would like to re-enable a field, locate the field on the Case Fields list by using the Show Disabled toggle. Then, click the Actions button and select Enable. This will automatically enable the field.

Enabling Disabled Fields
Updated 9 months ago
