Dispositions
Dispositions can be used on case forms to document the outcome of an interaction. These can be helpful to see at a glance when reviewing case history, or for identifying larger trends through reporting. Dispositions can be enabled to display on the case form per queue. See Queues for enabling Dispositions.
To access the Dispositions page, navigate to Administration > Case Admin > Dispositions from the left navigation menu.

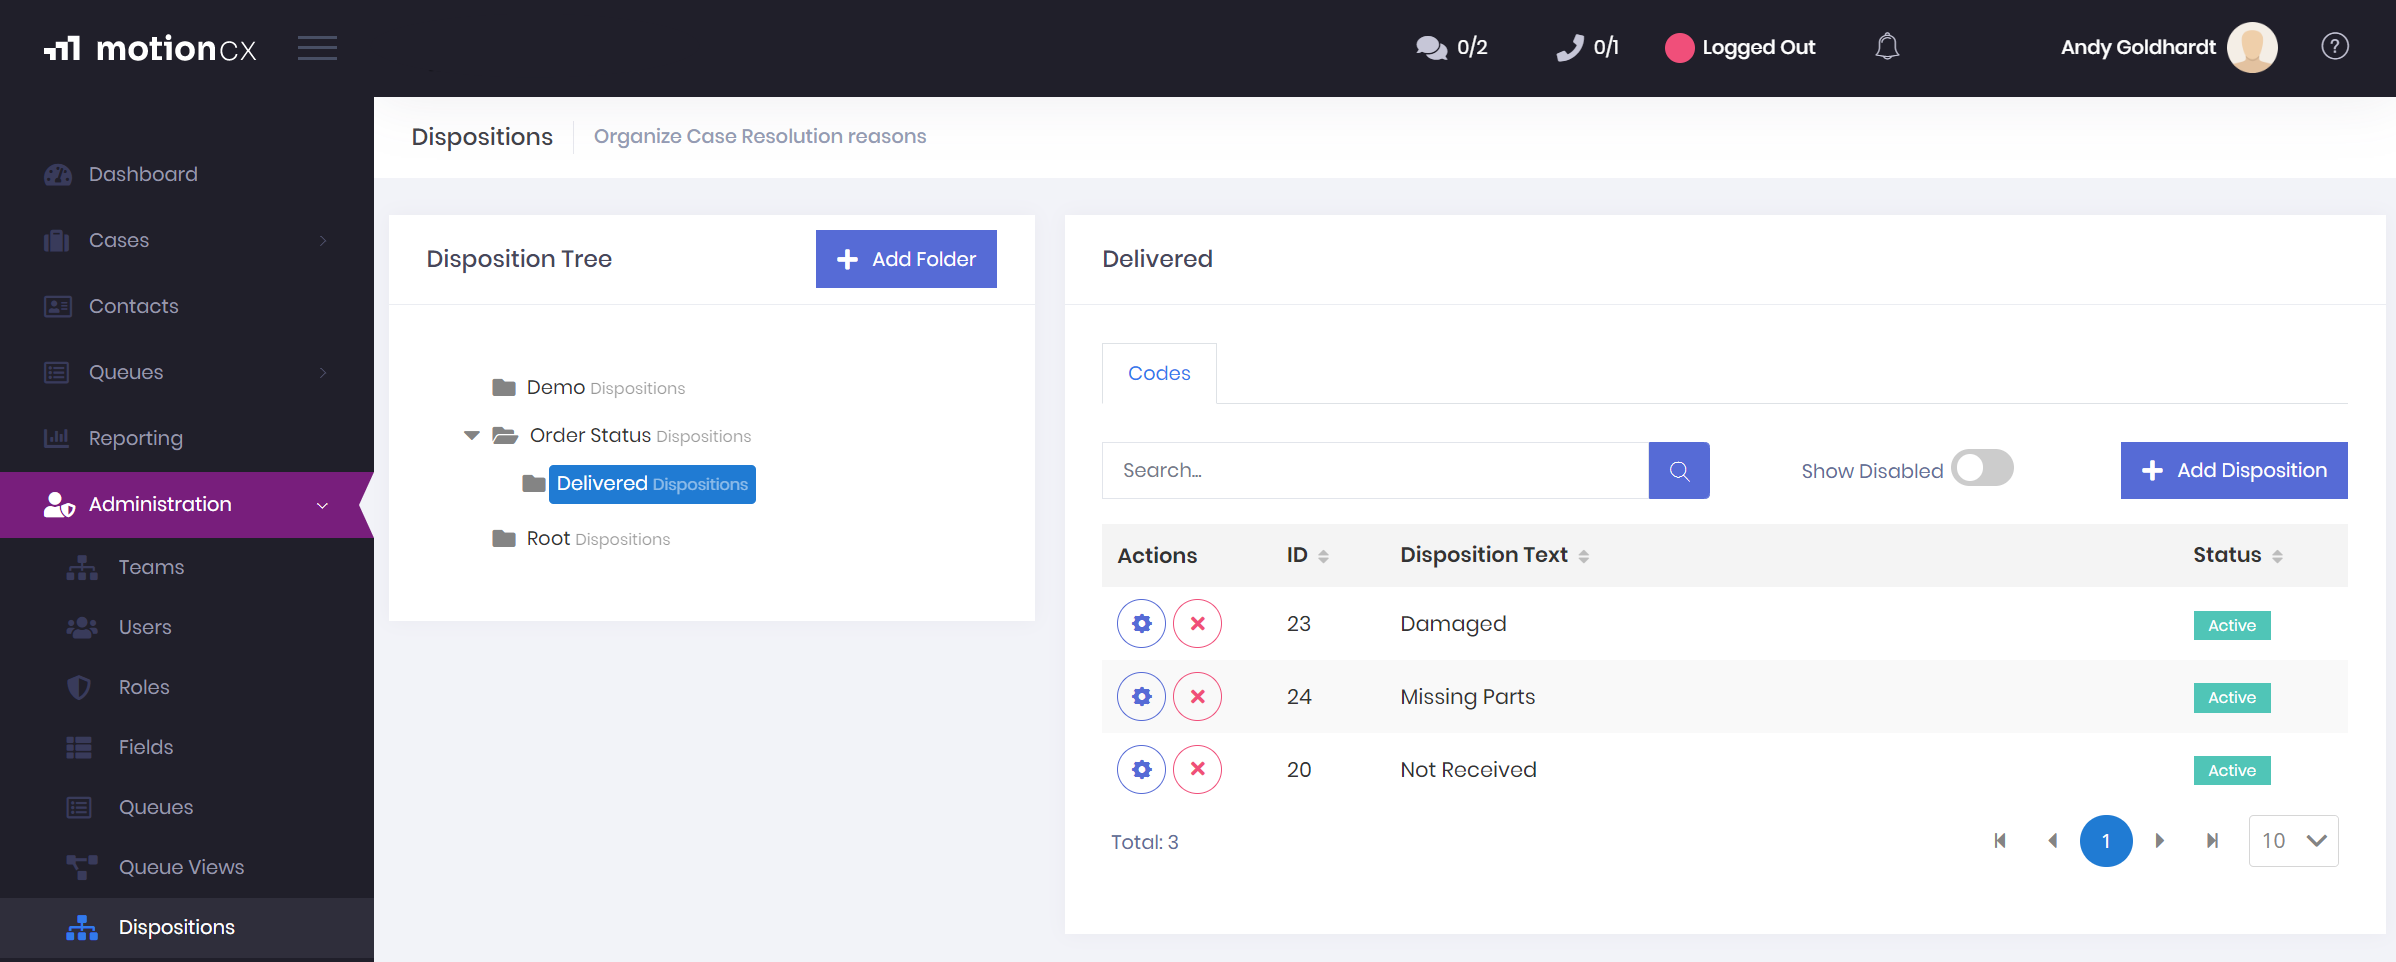
MotionCX Dispositions Administration
Disposition Tree
The Disposition Tree displays the organization of disposition categories in a hierarchical view. The hierarchy can be expanded by clicking the triangle next to the disposition category. See the Dispositions Case Form Eample at the bottom of this page for more detail on how the disposition categories and child dispositions will display on the cases form.
Creating Disposition Categories
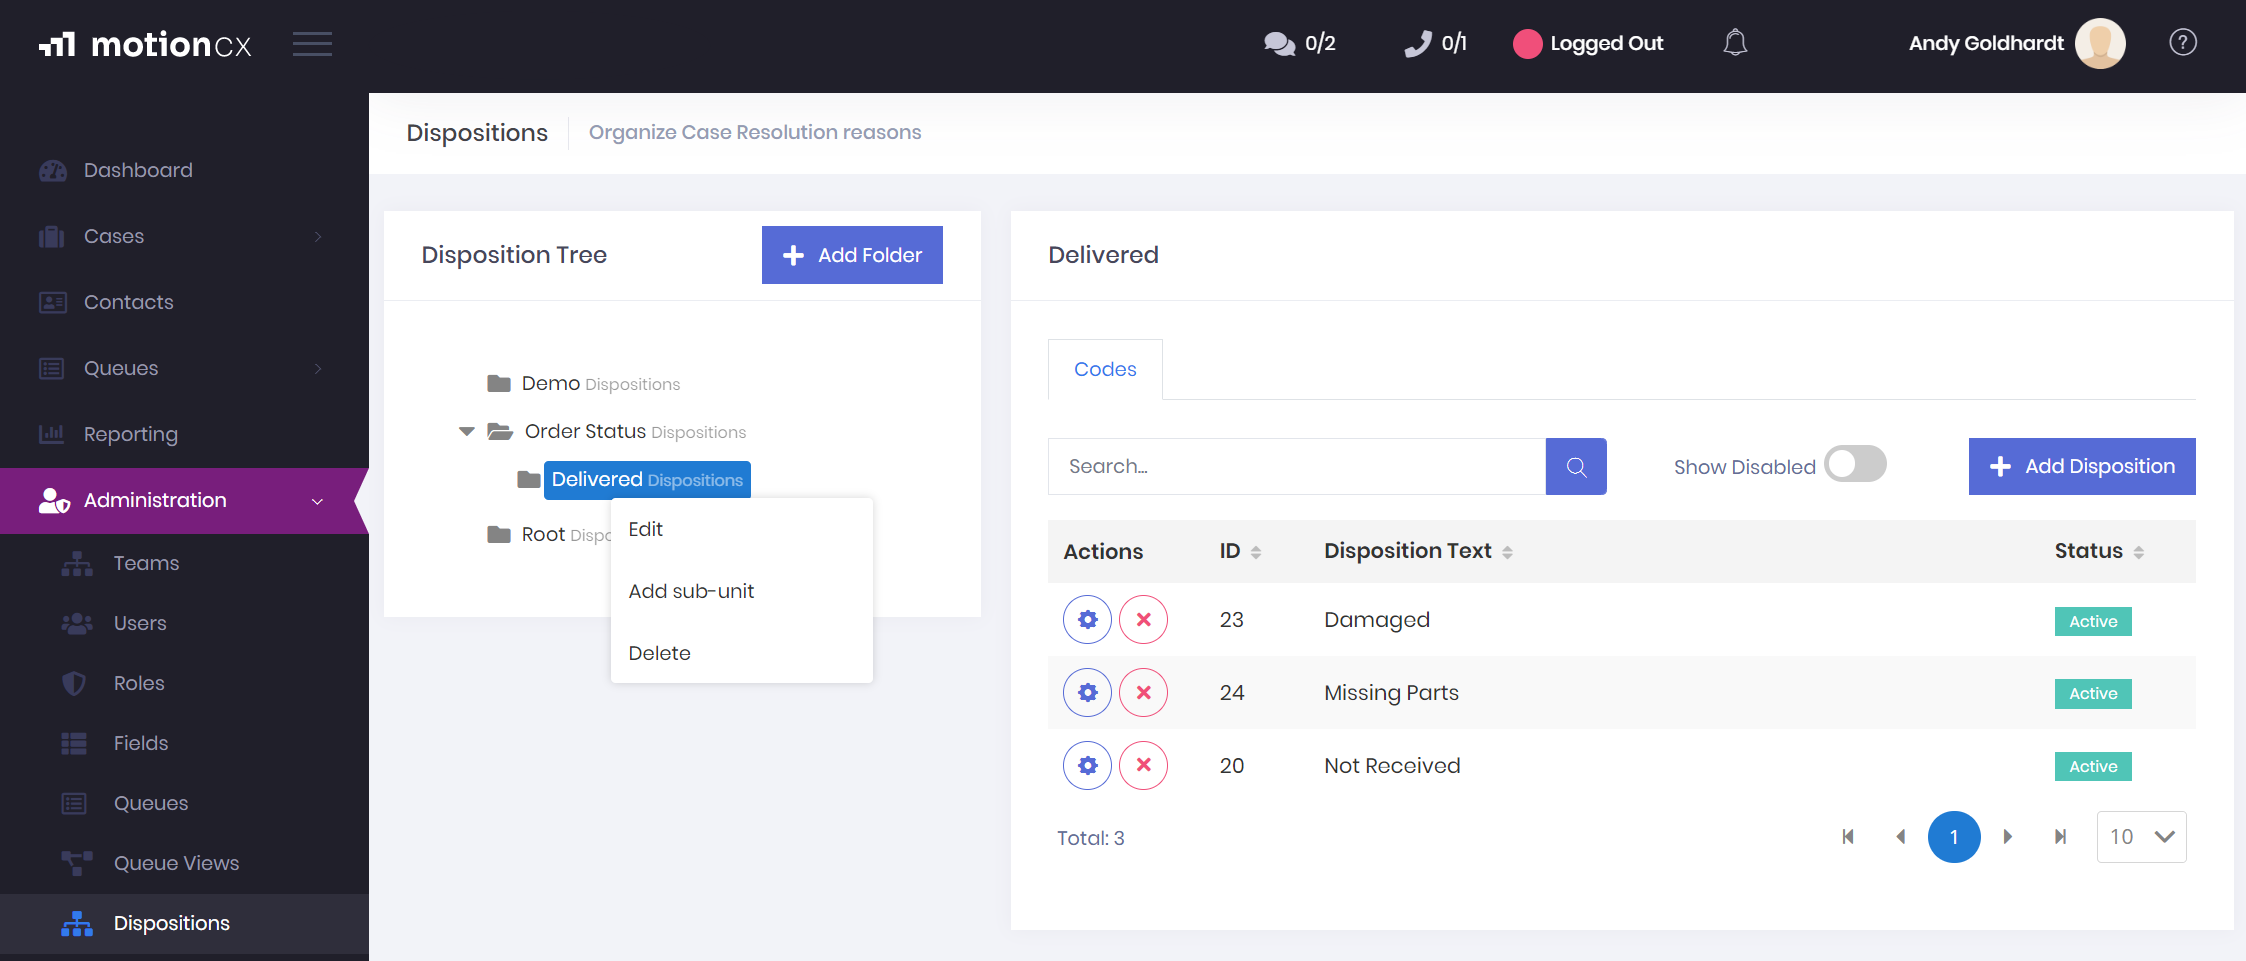
To create a disposition category, click the Add Folder button. Sub-categories can be created by right clicking an existing disposition category, then selecting Add Sub-Unit.
Renaming A Disposition Category
A disposition category can be renamed by right clicking on the disposition category name and then clicking the Edit button.
Deleting A Disposition Category
If you would like to delete a disposition category, right click on the disposition category and then click the Delete button.
Deleting Disposition CategoriesDeleting a disposition category will delete all dispositions that are included within that category. This is a permanent delete. The category and dispositions within the category will remain on associated cases until the case is edited.

Editing Disposition Fields
Add/Edit Dispositions
Dispositions can be added to the Root category to display as top level dispositions, or added to disposition categories to be displayed as a child disposition options.
Add Dispositions
To add a disposition to a category, click to select the category in the Disposition Tree panel, then click the Add Disposition button. Enter a name for the disposition, then click the Save button.
Edit Dispositions
To edit an existing disposition, click the Gear button next to the disposition.
Disabling Dispositions
If you have an existing disposition that you no longer wish to be displayed as an option on the case form, the disable functionality can be used.
To disable a disposition, select the category containing the disposition from the Disposition Tree panel, then click the X button next to the disposition name.
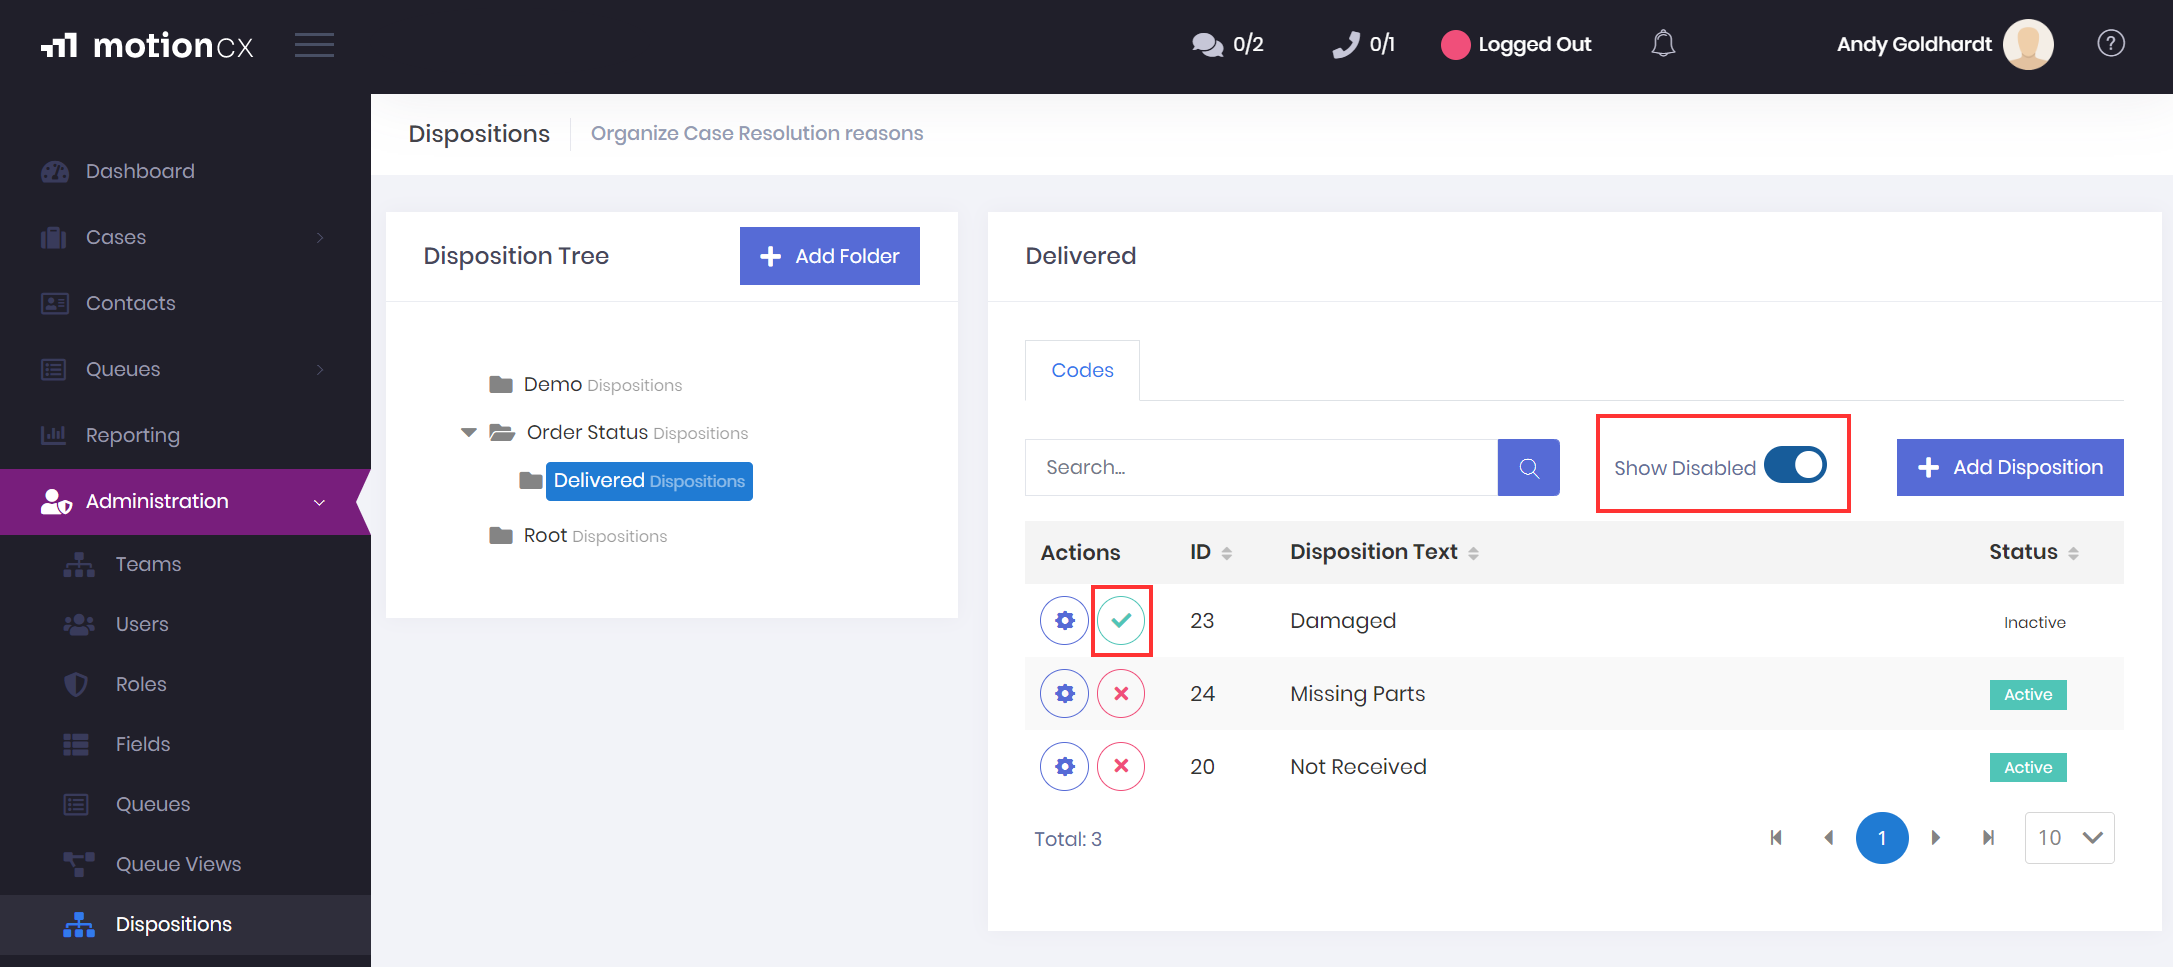
If you would like to re-enable a disposition, select the category containing the disposition from the Disposition Tree panel, then use the Show Disabled toggle to locate the disabled disposition. Click the Green Check button next to the disabled disposition. This will automatically enable the disposition.

Enabling Disabled Dispositions
Dispositions Case Form Example
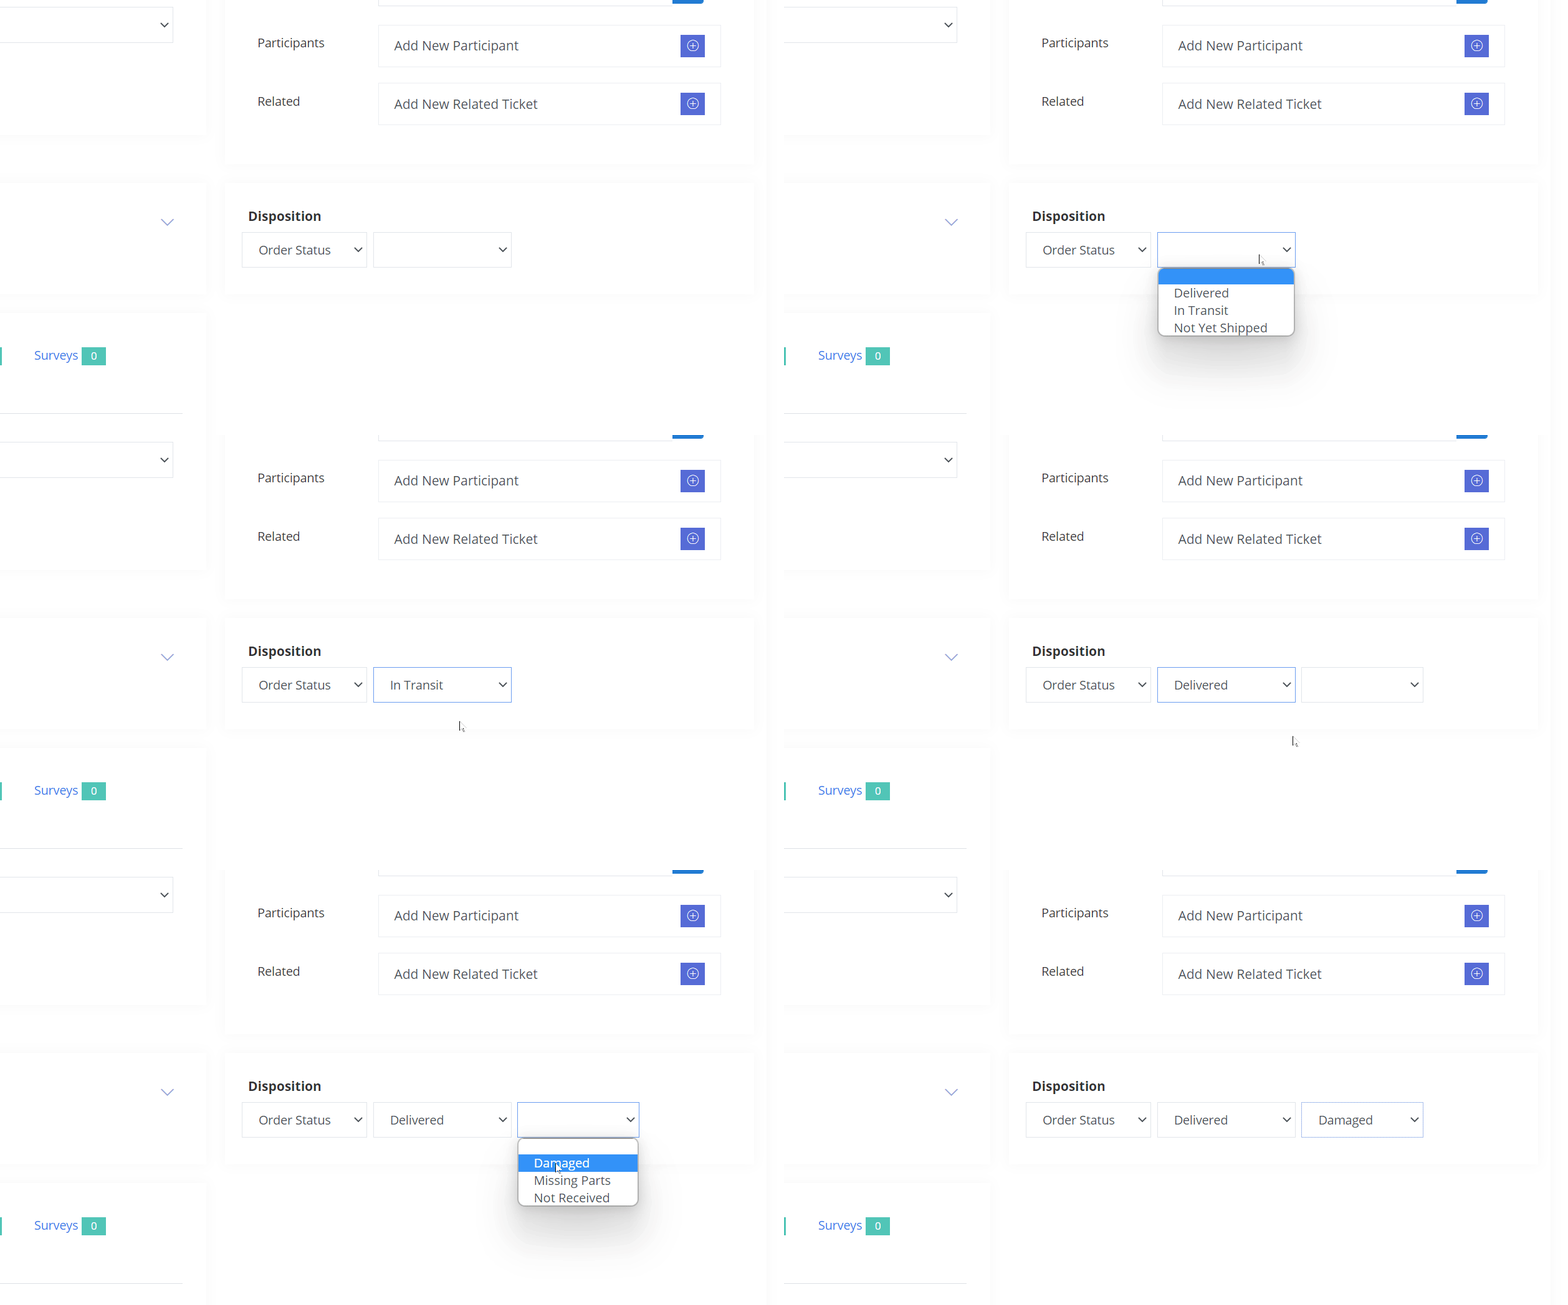
The example below shows how disposition categories and their children dispositions will display on the case form screen. In this example, 'Order Status' has been created as a top level category and contains the dispositions of 'In Transit' and 'Not Yet Shipped'. A sub-category of 'Delivered' with dispositions of 'Damaged', 'Missing Parts' and 'Not Received' has ben added under the parent category of 'Order Status'.

Case Form Disposition Example
Updated 9 months ago
